How to Use the Add Item Wizard on Deliverit Studio
This guide will walk you through how to use the Add Item wizard in Deliverit Studio.
Step-by-Step Instructions:
Log in to Deliverit Studio:
Go to my.deliverit.com.au and log in using your Deliverit Cloud credentials.

Once logged in, find Menu Manager and click on Items.

Note: If you don't see the "Add Item" button, it might be because your Dpos software version is incompatible. Ensure your store hardware is running Windows 10 with DPos Version V02.20.43 or higher. You can check your version by scrolling to the bottom of the menu on the left.


Click the plus sign (+) next to "Menu Items" to commence.

Category: Select the category for your item.
Note: To create a new category, simply type the category name in the Category field and press Enter. This will automatically create and add the new category to your list.
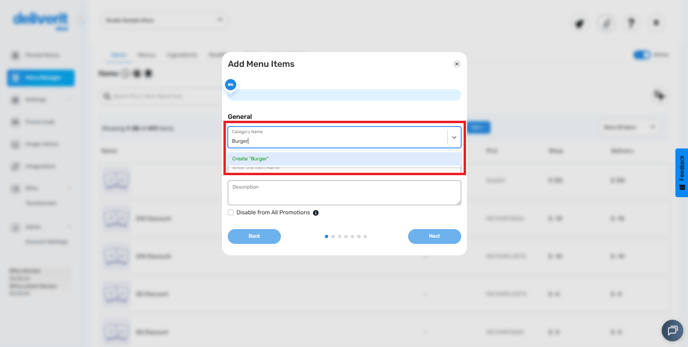 Item Name: Enter the name of the item.
Description: Write a description of the item. 
If you want to exclude this item from all discounts and promotions, tick the ‘Disable from All Promotions’ box. This will ensure the item is always sold at full price.

When done, click the "Next" button.
Note:
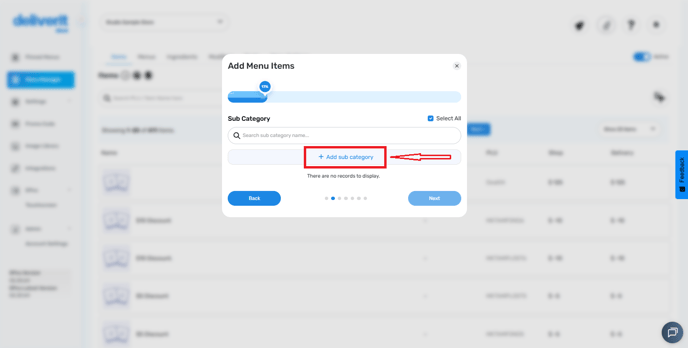
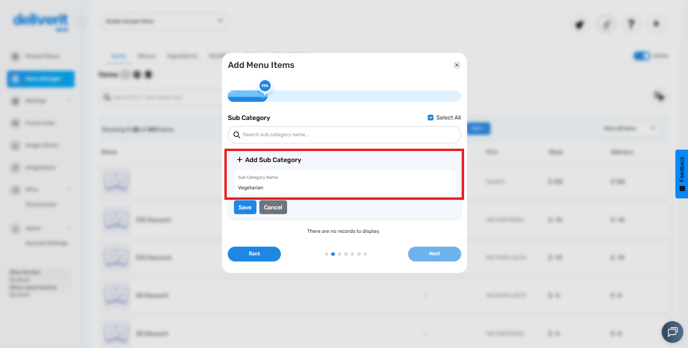
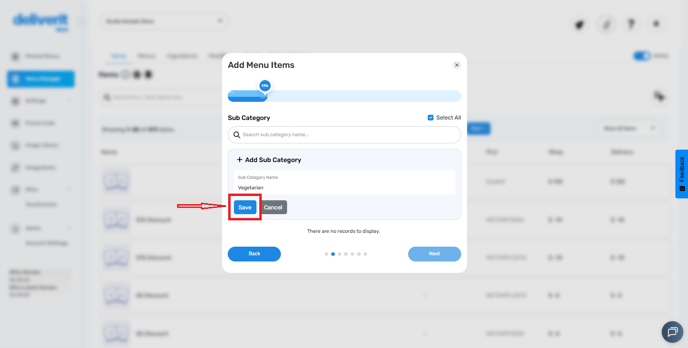
- To create a subcategory, click Add Subcategory, enter your desired subcategory name, and then click Save.
- You can also add multiple subcategories.
Set Item Pre-sets:
The pre-sets for PLU (Price Look-Up codes), name, and sizes will be filled in based on your selected sub-category. If the item is designated for all the Subcategories (Eg, Small Pizza, Large Pizza, Family Pizza), then tick the Select All option on the top left and leave it unticked to select the required Subcategories manually.
For a clear step-by-step guide on How to set the Item Pre-sets, follow this link
Click "Next" when done.

Choose the price for each size from the dropdown menu.

Toggle the Apply All button to set the same price on all platforms, or un-toggle it to set different prices for each.

Or un-toggle it to set different prices for each platform.

Additionally, you can set the price as a Dollar Amount or a percentage, and then click the Next button.

Upload Item Image:
Upload an image of the item from your image library or local drive.
Click "Next" after selecting the image.


Choose the ingredients from the dropdown menu. The available ingredients will change based on the ingredient group you select.
Click "Next" when done. 

Add Modifiers (Optional):
You can add modifiers or additional options for the item. If you set the minimum selection to 1, the customer must choose this option before adding the item to their cart. If the minimum is set to 0, the modifier is optional. 
Click the next button.
Assigning an Item to a Menu
-
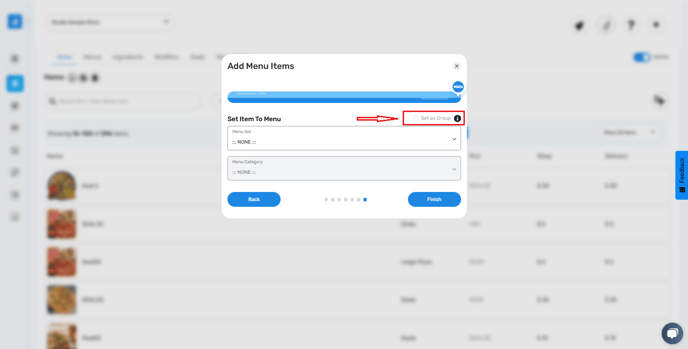
Toggle the "Set as Group" option if the item is part of a group (e.g., meal deals or combos).
-
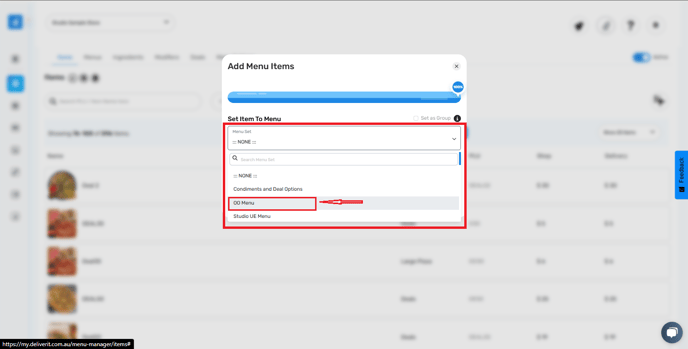
Select the menu set where you want the item to appear (e.g., online ordering or third-party platforms).
-
Choose the appropriate menu category (e.g., Pizza, Drinks, Sides) to ensure the item is placed correctly.

Click the finish button.

Deploy the Item:
A pop-up will confirm that the item has been added, and an option to add more items is provided, or to finish the setup.

Go to the upper right of the page and click the rocket icon to deploy the changes.
Tip: The new item tag will be displayed next to the items that are part of the new deployment.

A prompt on the bell icon will confirm that the deployment was successful.

Go to the item section and search for the item to ensure it has been added.

By following these steps, you will be able to utilise the Add Item Wizard on Deliverit Studio efficiently. If you need further assistance, simply click the blue chat icon at the bottom-right corner of the screen to connect directly with our Application Support Team.