
How to Upgrade DPOS Version via Studio
✅ Cloud is enabled
✅ Sync App is running without errors
✅ Current DPOS version is v02.20.72 or higher
Step-by-Step Upgrade Process
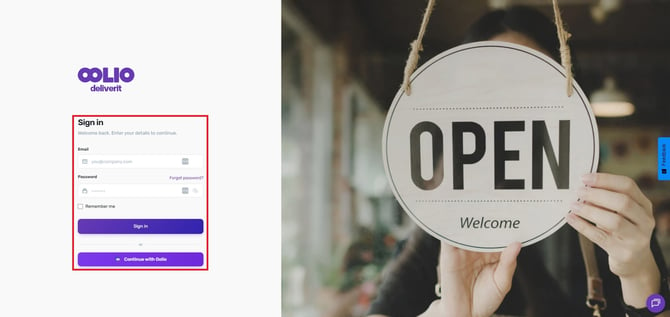
✅ Log in to Studio
-
Sign in with your credentials
✅ Select the Store
-
Use the top-left dropdown menu to choose the correct store
✅ Check the Current Version
-
Look at the left navigation panel
-
If you see a message like “Please upgrade your DPOS to Version 02.20.37,” a manual upgrade is needed
-
If the version is current, it will say “Latest Version”
✅ Look for Upgrade Availability
-
If an update is available, you’ll see a blue “Upgrade” button
✅ Initiate the Upgrade
-
Click the blue Upgrade button
-
Confirm the command in the pop-up
-
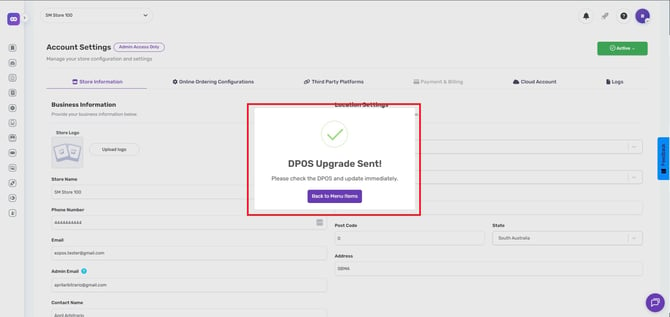
A confirmation will show that the upgrade has been sent
✅ Complete the Upgrade on the Store Terminal
-
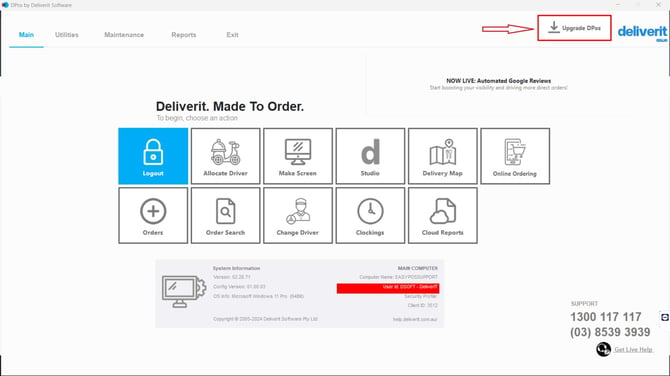
On the DPOS terminal, press the red Get Upgrade button
-
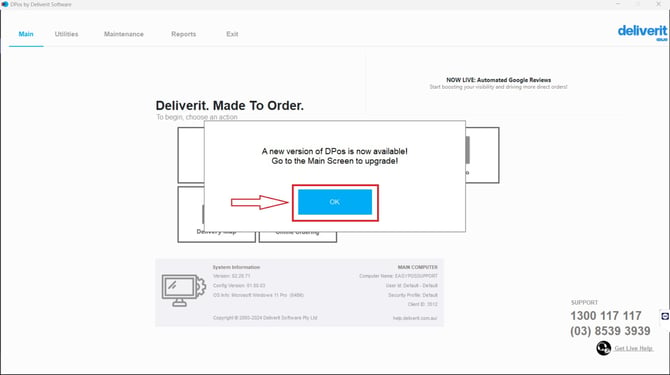
Click OK on the new version prompt
-
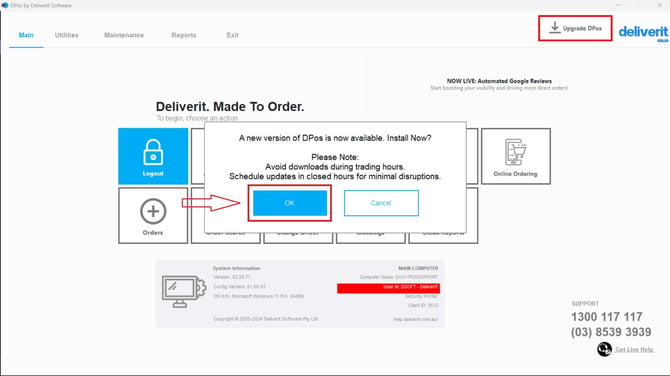
Click OK again to install the upgrade
✅ Download and Install
-
Installation will take around 5–10 minutes
-
Once complete, restart DPOS
-
Verify the new version in Studio
✅ Post-Upgrade Check
-
Test basic functions like order processing and syncing to confirm everything is working
Tip: Perform upgrades during off-peak hours to avoid interruptions in service.
Preconditions: Make sure the following conditions are met before proceeding:
- ☑️ Cloud is enabled.
- ☑️ Sync App is running without errors.
- ☑️ DPOS version is v02.20.72 or higher.
Note: If these requirements aren’t met, contact support before continuing.
Step-by-Step Upgrade Process
Log in to Studio
- Enter your Deliverit Studio credentials and sign in.
Check Current Version
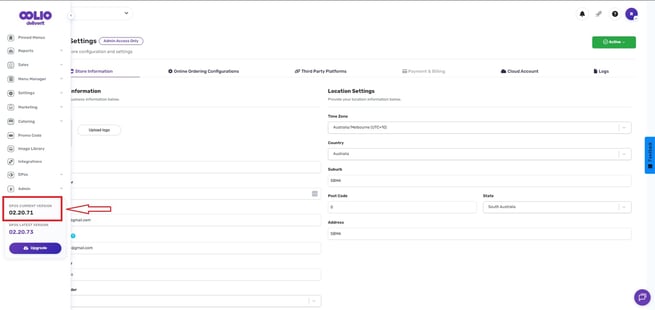
- ✅ When a new version is available, it will be identified by the "Latest Version" tag.
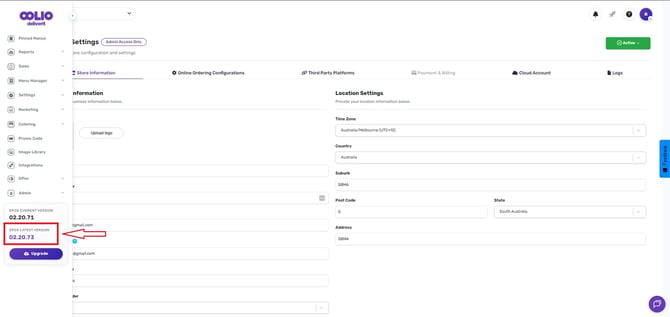
Look for Upgrade Availability
- If an update is available, a "Upgrade" message will appear.
- Click the blue upgrade button to send the upgrade command to the store’s DPOS system.
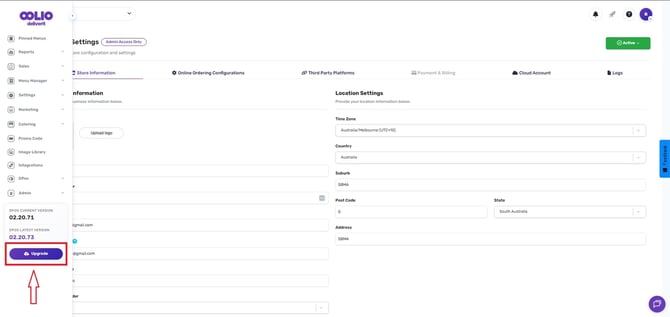
- A confirmation will appear that the upgrade has been sent.
-
On the store terminal, DPOS will display the following upgrade prompts:
- A new version is available. Click OK to proceed.
- A red Get Upgrade button will appear on the main menu. Select Upgrade DPOS to continue.
- A pop-up will ask, Do you want to install the upgrade? Click OK to confirm.
Download and Install the Update
- DPos must be closed before the update can be pushed.
- Click Yes.
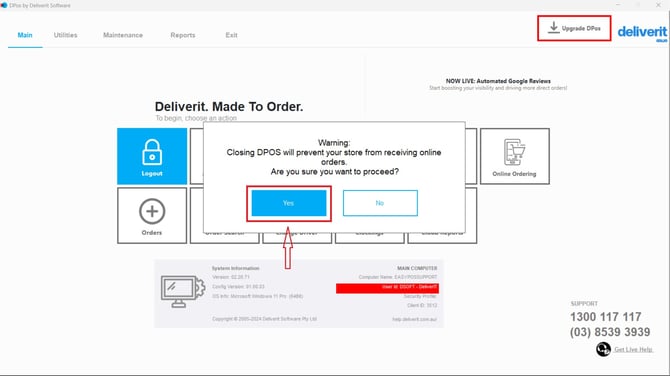
- The system will begin downloading and installing the new version.
- This process takes approximately 5 minutes, depending on internet speed and hardware performance.
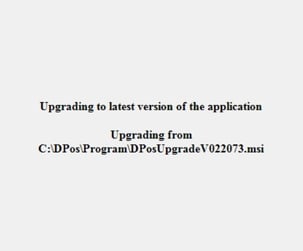
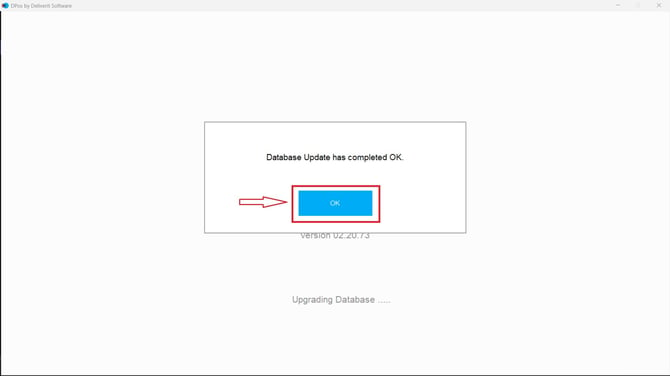
- Once complete, restart your DPOS.
- A confirmation will pop up that the update is complete
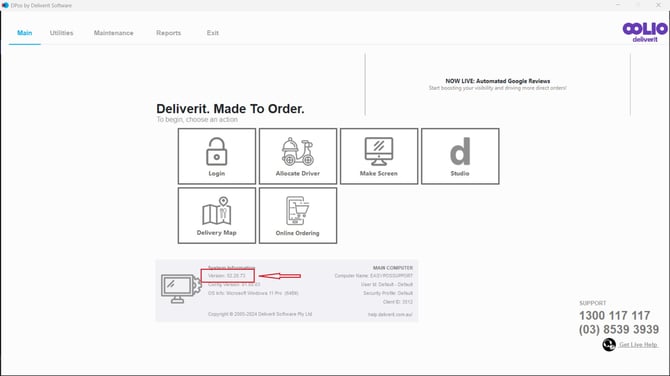
Once complete, verify the new version appears in the Studio panel. Always test key functions like order processing and syncing after the upgrade.
By following these steps, you will be able to upgrade your DPOS version via Studio with ease. If you need further assistance, simply click the blue chat icon at the bottom-right corner of the screen to connect directly with our Application Support Team.