
Updating Modifier Options
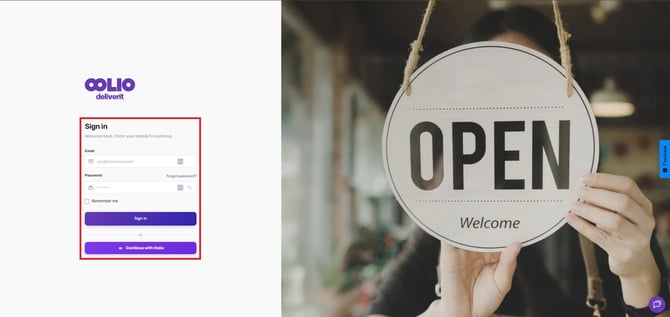
Log In:
Use your credentials to log in to my.deliverit.com.au.
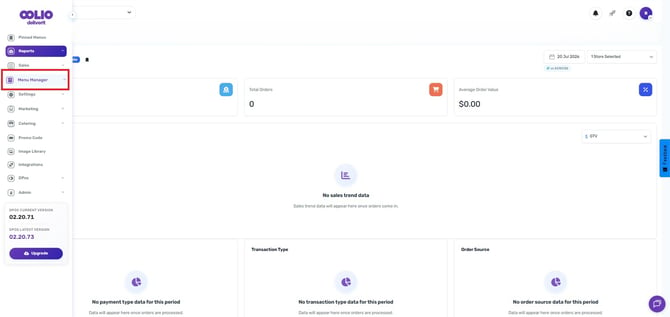
Navigate to Menu Manager:
Go to Menu Manager
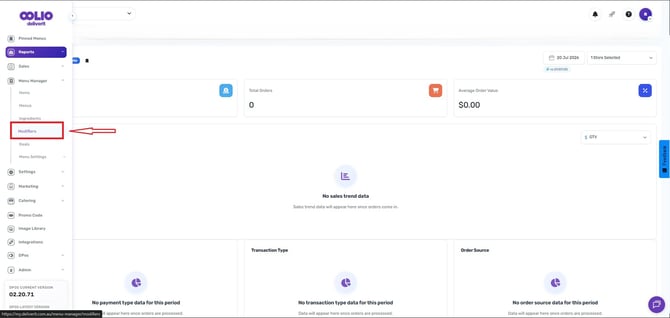
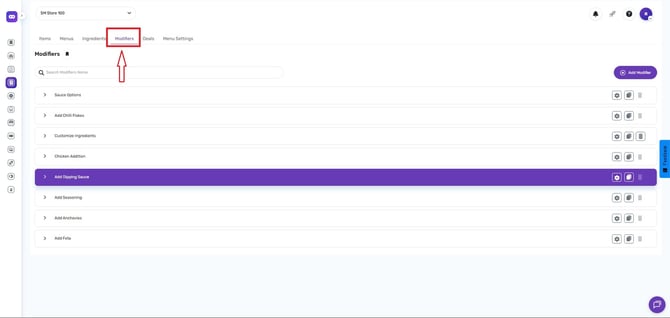
Choose Modifier
On the selection, choose Modifier.
Select an Item:
Choose the item you wish to update or edit.
For this example, we'll use the modifier "Add Dipping Sauce":
-
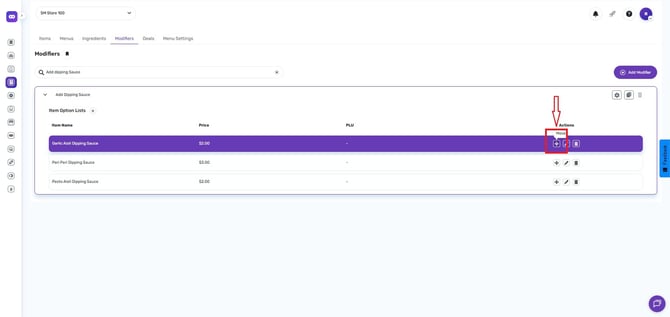
Garlic Aioli Dipping Sauce
-
Pesot Aioli Dipping Sauce
-
Peri Peri Dipping Sauce
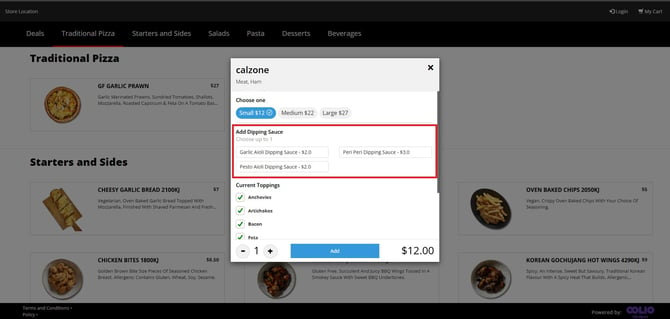
Click on the Modifier.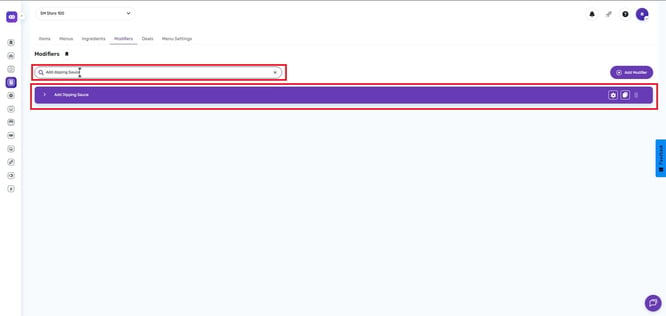
Edit Modifier:
This function will allow you to move the item list and organise positions.
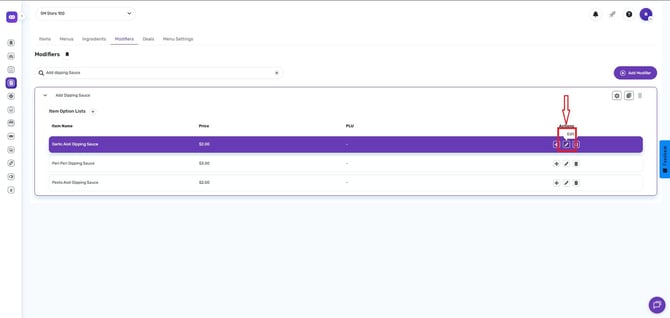
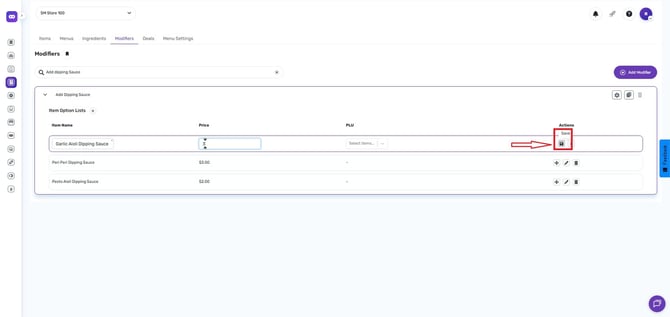
Update Price / Description:
Here you can edit the current item option list.
Note:
- If the ingredient you added has a Product Code, the system will automatically use the price linked to that PLU.
( The price edit will be disabled.) - If there’s no PLU, you can manually edit or set the price yourself.
Set the price for the new item.
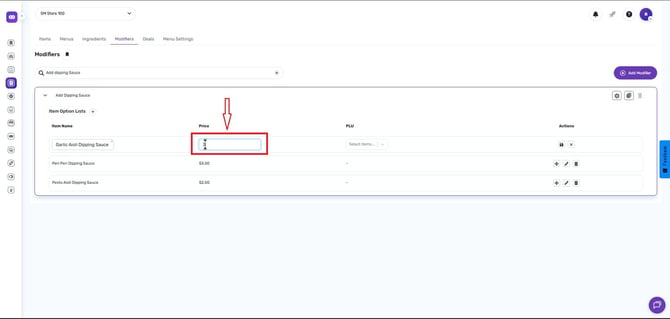
Click Save.
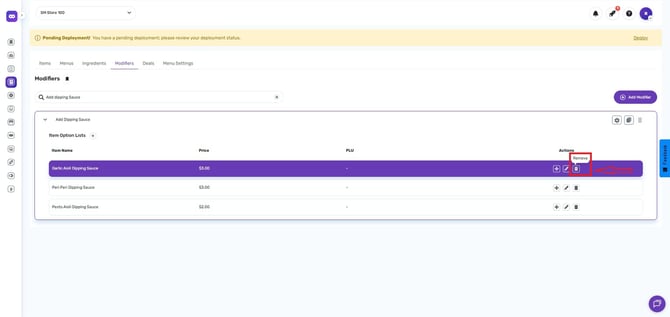
Remove modifiers:
You can also remove a modifier option by clicking the Bin icon.
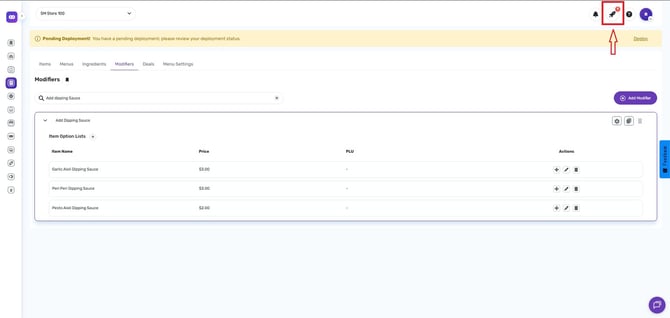
Deploy:
After saving, click the rocket icon in the upper right corner of the page.
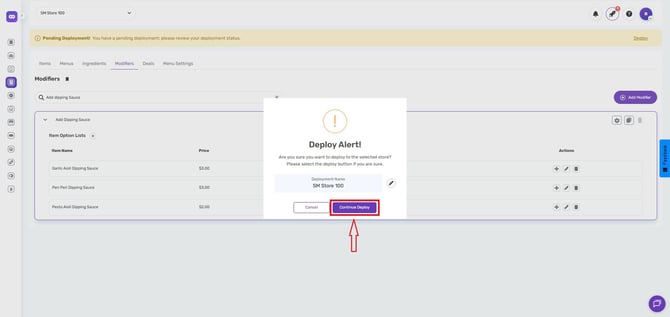
Click the Deploy button.
Refresh Your Website:
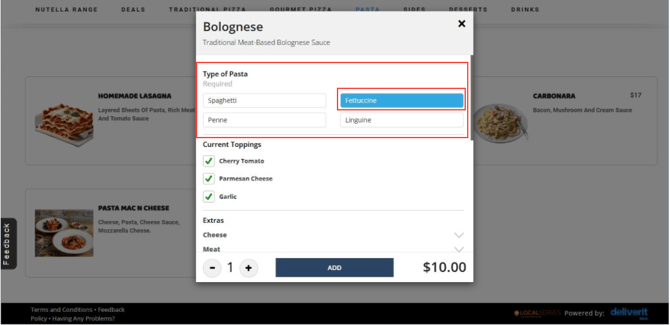
Go to your website in your browser and hit the Reload button to see the changes.
Creating a New Modifier Group
Navigate back to Menu Manager and choose the Modifiers tab.
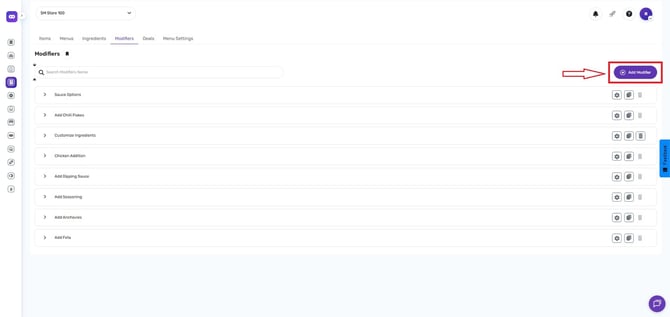
Add a New Modifier:
Click the (+) icon to add a new modifier.
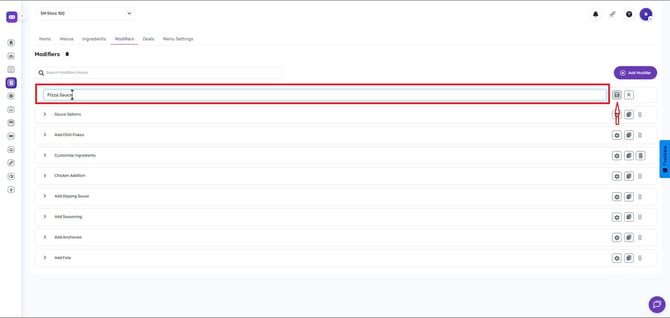
Type the modifier group name and click Save.
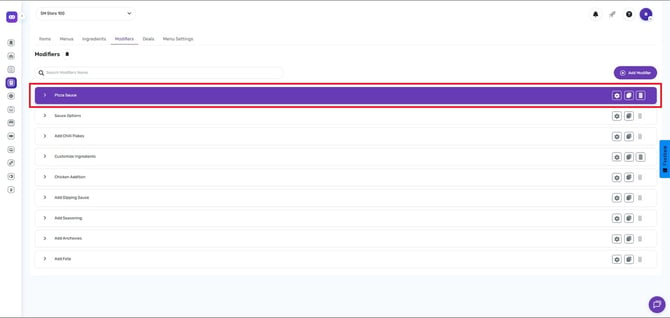
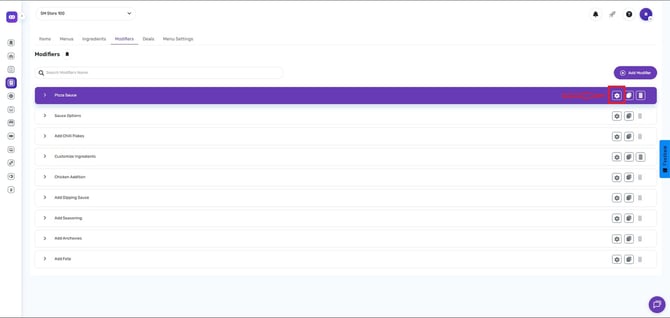
After saving, Click on the modifier you created.
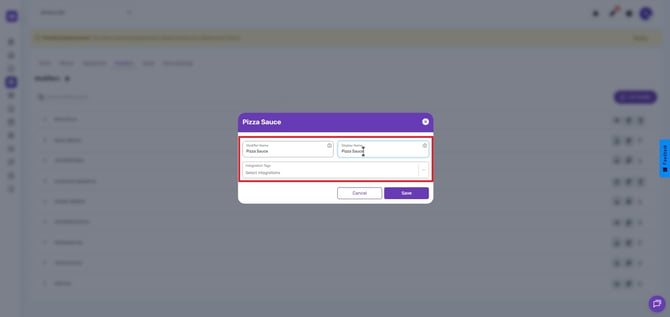
You can update the Modifier Name, Display Name, and Integration platforms.
Then, click Save.
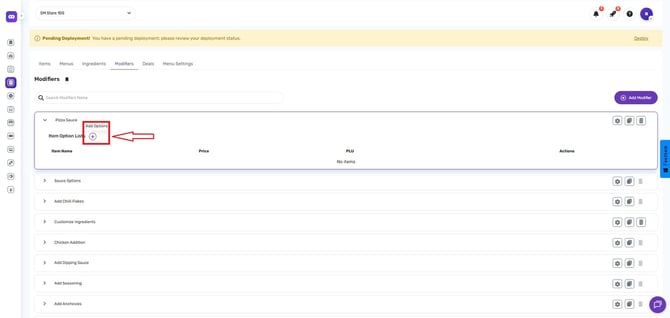
Add a Modifier Option List:
Create the item name and price for each option. (PLU is optional)
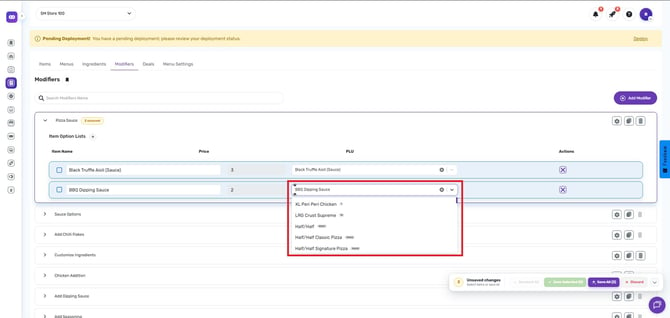
Click Save and Deploy
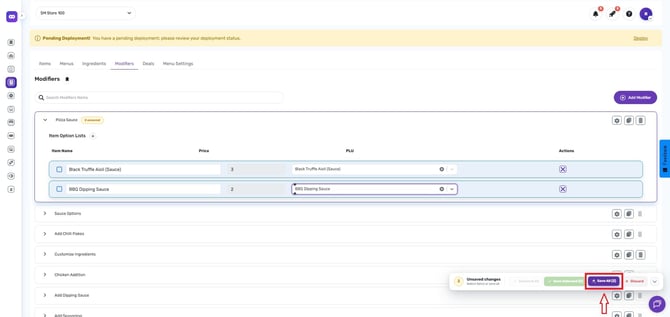
Note: The price of these options will be added to the base price of the main item.
Assign Modifiers to Items
Navigate to Items:
Go back to the Items tab.
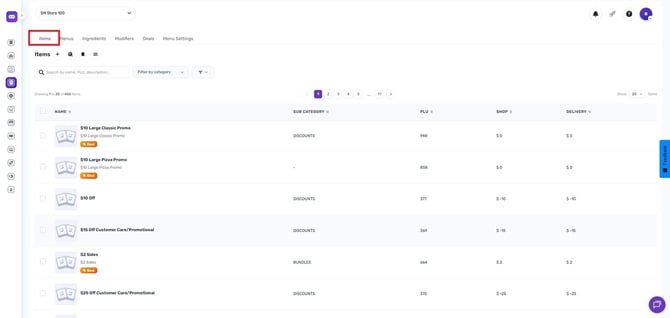
Search for the Item:
Search and select the item you want to add the modifier then select.
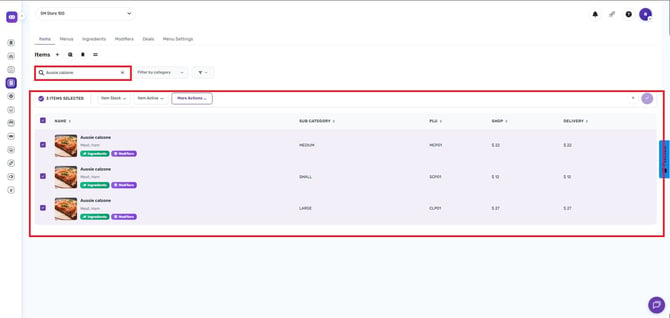
Click on More Actions button.
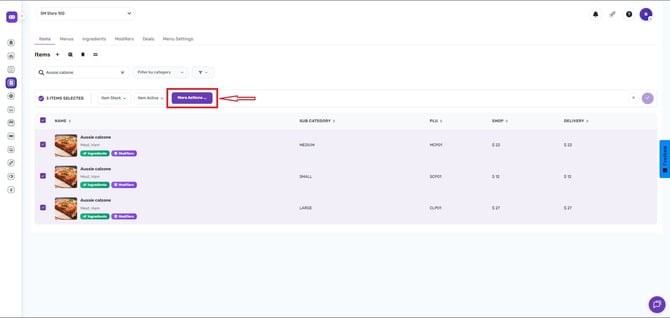
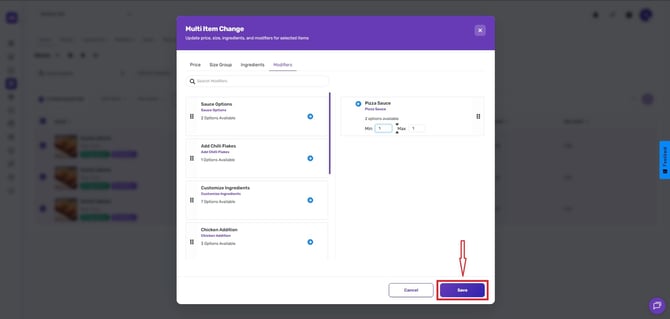
Go to the Modifiers tab.
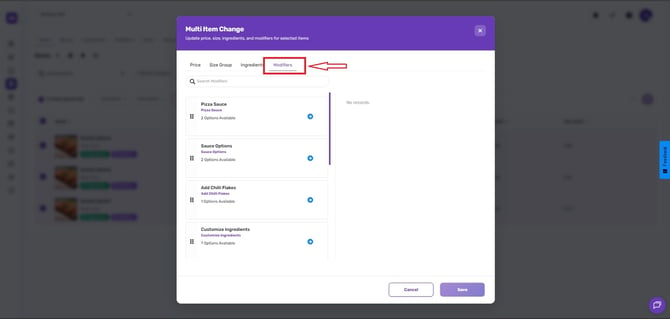
Assign Modifiers:
Scroll down to see the modifiers you've created on the left side of the page.
Click the right-pointing arrow to assign them.
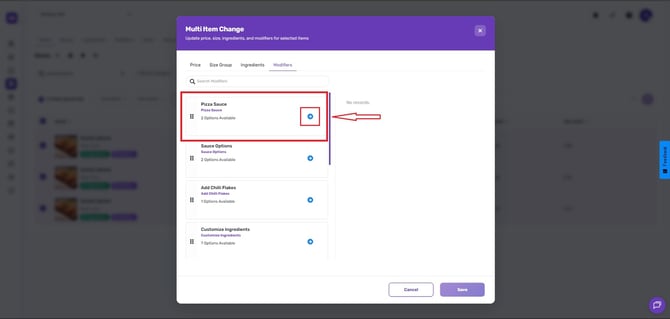
Set Modifier Requirements:
By default, modifiers are required for customers when placing an order (minimum selection is set to 1).
To make the modifier optional, set the minimum to 0.
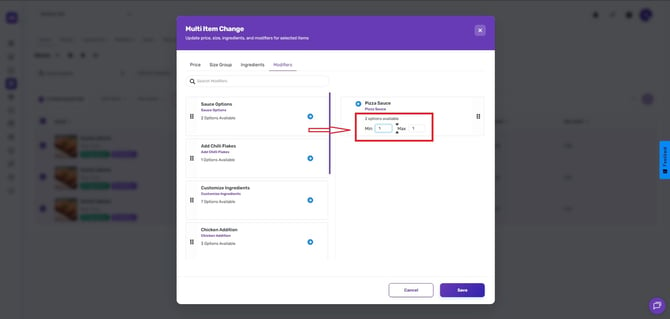
Click the Save button.
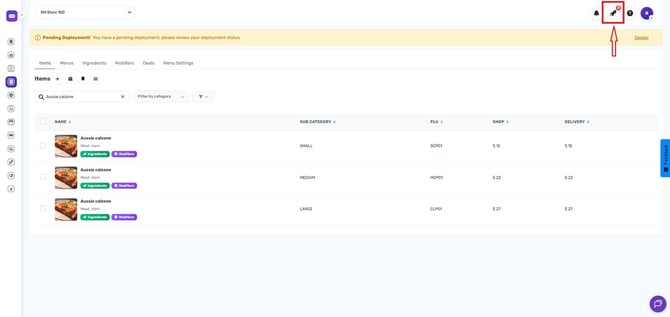
Deploy:
After saving, click the rocket icon in the upper right corner.
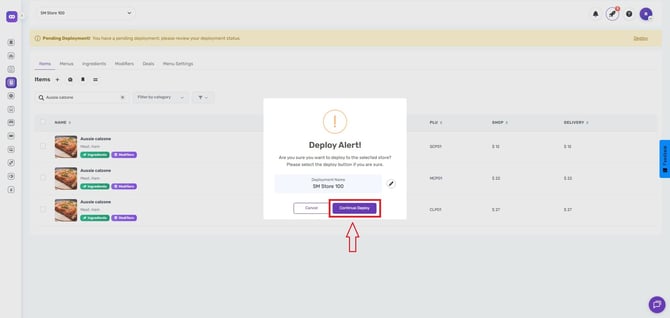
Click the Deploy button.
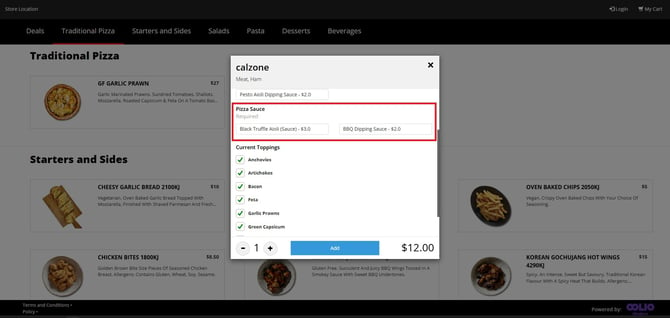
Reload Your Website and integration platforms
Go to your Website, Ubereats, Doordash in your browser and hit the reload button to see the changes.
By following these steps, you will be able to update and create modifiers in Deliverit Studio efficiently. If you need further assistance, simply click the blue chat icon at the bottom-right corner of the screen to connect directly with our Application Support Team.