Step-by-Step Guide
Log In to Oolio POS
- Log in to https://pos.oolio.io/pos

- Click on the Store

- Enter your assigned PIN or login credentials to access the system.

Select the Order Type
- Click on the drop-down button.

- Tap Dine In to set order type.

Add Table
Create a new table for the customer:
- By the Open Table button
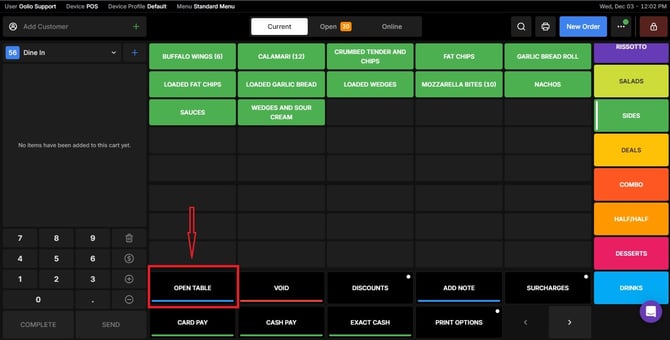
- By the Plus Icon.
 Once completed, tap Set Table & Guest to confirm and proceed.

Add a Customer
- Tap Customer at the top of the screen.
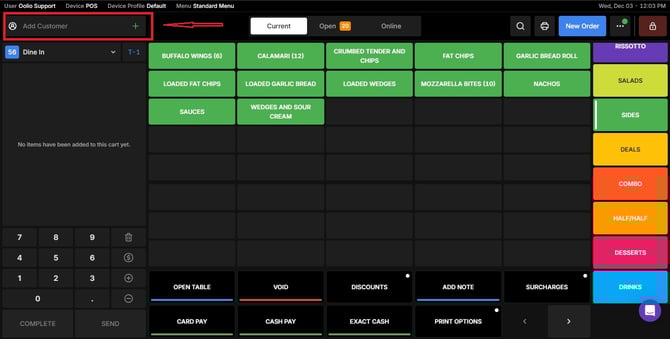
You may:
- Search for an existing customer, or

- Add a new customer by entering their details, such as:
Name
Phone Number
Email Address
Address
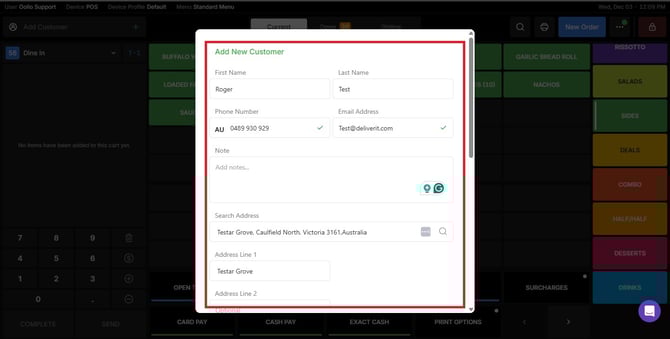
- When done, click the Create button.

Tip:
Adding customers helps with loyalty tracking, order history, future promotion campaigns, and maintaining accurate customer records.
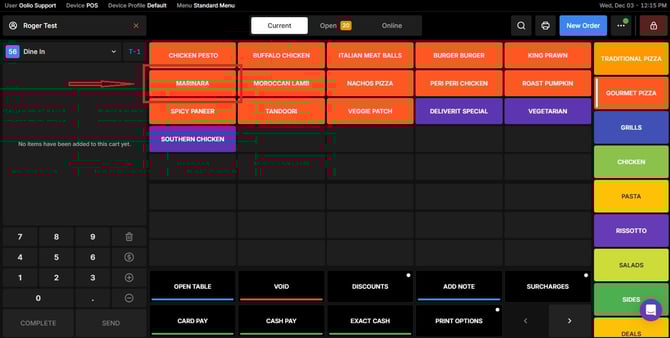
Add Items to the Order
- Browse through your menu categories.

- You can also search for items using the search function.
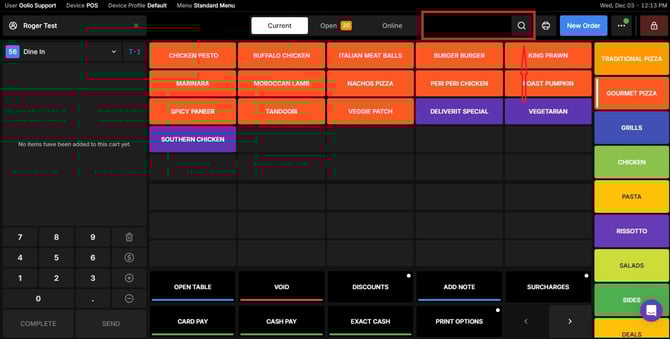
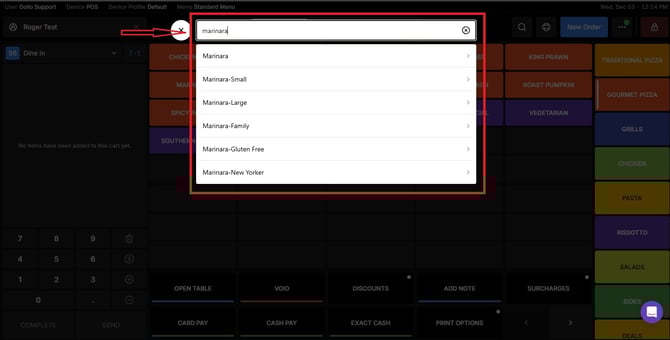
- Tap an item to add it to the cart.
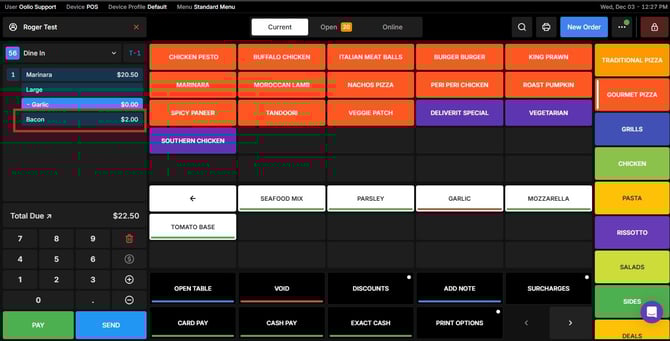
If required, select:
- Size variations.

- Default Ingredients

- You can add or remove ingredients at any time.
- To remove an ingredient, simply click on it — it will be removed instantly.
To add it back, click the ingredient again.

- Ingredients / Modifiers


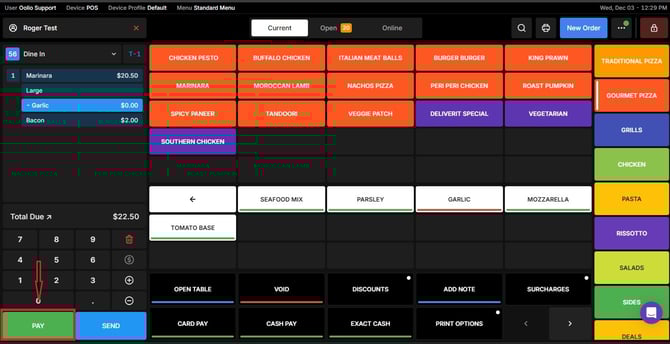
Finalise the Cart
Once all items have been added:
- Review the cart.
- Tap Pay when you’re ready to proceed.
Choose the Payment Method
Select the payment option the customer prefers:
- Cash

- Card Payment
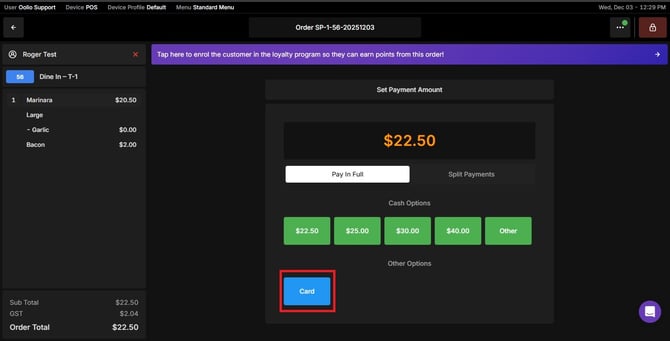
- Exact Amount

-
Split Payment -Use this option when customers want to share the bill. You can split the total equally or let each person pay for specific items.

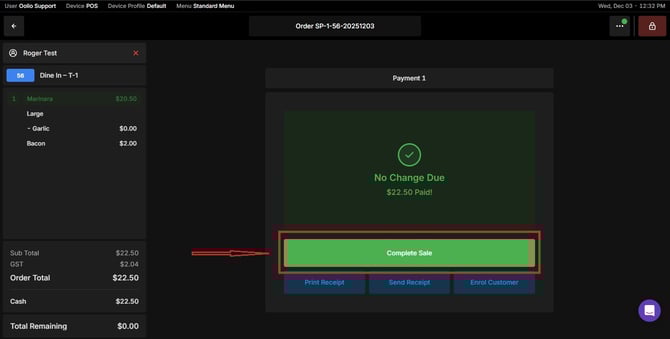
Process the payment and wait for the confirmation notification.
Complete the Order
Once payment is successful:
- Oolio POS will finalise the transaction.
- A receipt will be provided either as a printed copy or sent via email, or enrol the customer (Loyalty) based on your selection.
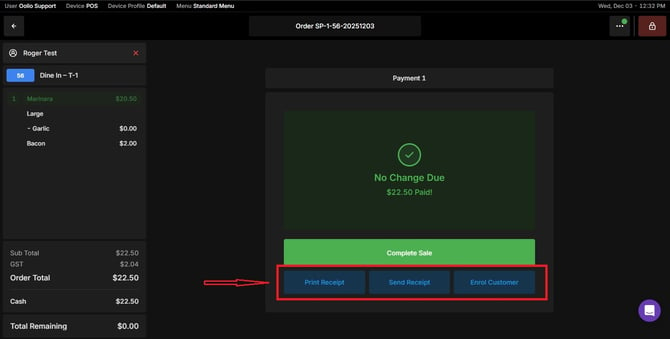
By following these steps, you can efficiently process dine-in orders using Oolio POS.
If you need further assistance, simply click the blue chat icon at the bottom-right corner of the screen to connect directly with our Application Support Team.