How to Resize Existing Table Layout on DPOS
Need to adjust the size or layout of your tables in DPos? Resizing your table layout helps improve accuracy and usability for your dining service. Follow the steps below to make changes safely and effectively.
Step-by-Step Guide
Log in to DPOS
Open the DPOS application and log in with your staff credentials.

Create a Backup (Recommended)
- Before making any changes, it’s a good idea to back up your current settings.
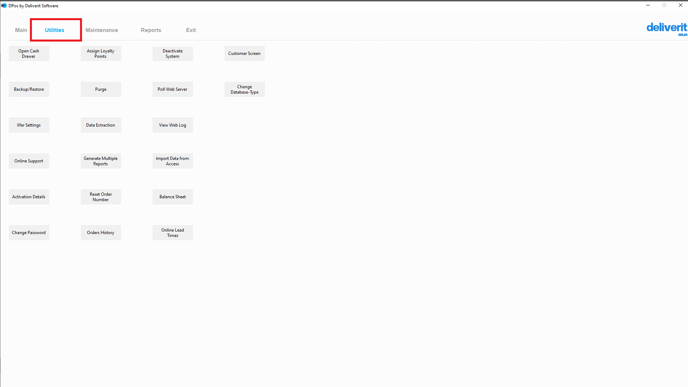
- Go to the Utilities tab.

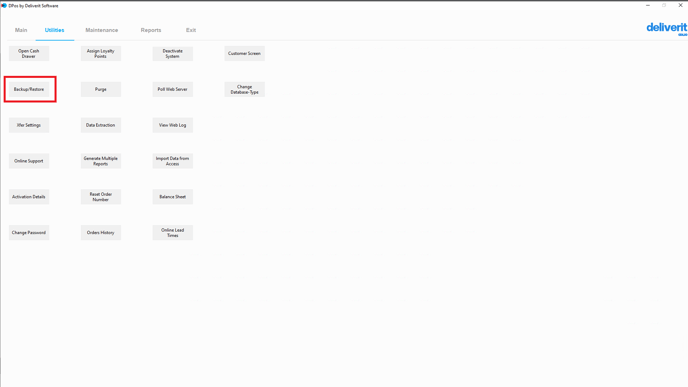
- Click Backup/Restore.

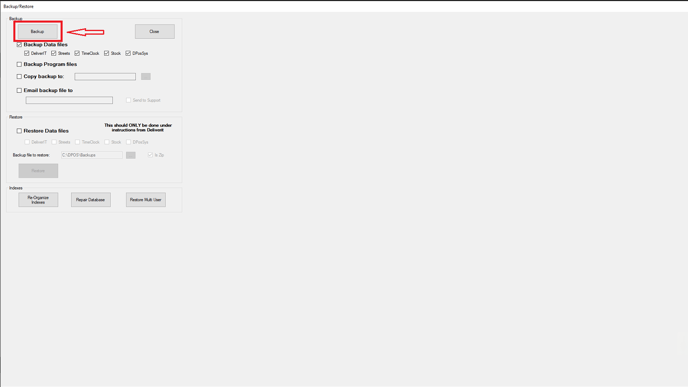
- Click the Backup button to save your current configuration.

Note:
Please ensure all open tables have been paid off (closed) prior to editing the layout
Go to the Orders Section
From the main menu, tap on the Orders section to access your table layout.

Select a Table Section
Choose the table section where you want to resize the tables.

Click the Edit Table Button
Tap the Edit Table button to open the layout editing screen.

Resize the Tables
There are two ways of adjusting the size of the table:
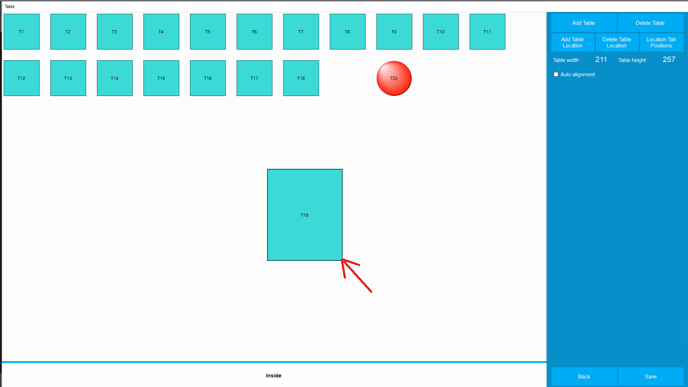
- By clicking the corner of the table.

- Double-click on the Table Width and Table Height fields.
Enter your desired dimensions to resize the tables.

Additional Customization Tips:
While editing your layout, you can also:
- Change the table shape
- Change the table color
- Edit table descriptions for better labeling

Save Your Changes
Once you're done editing, click the Save button.

Restart DPOS
To apply the changes, restart the DPOS application.
Note:
- Always restart DPos after editing your table layout to ensure the new settings take effect.
- To create a new table layout, simply follow this step-by-step guide. How to Create a New Table Layout on DPOS (Restaurant).
By following these steps, you’ll be able to resize and customize your table layout in DPos with confidence. If you need further assistance, please contact our application support team.