Step-by-Step Instructions
Log in to DPOS
Log in to your DPOS system using your staff credentials.

Open the Reports Menu
From the main screen, go to Reports.

Option A: Using the Mail List Report
This method is great if you're focused on emails tied to past orders.
Select "Mail List."
Find and click the Mail List report from the list.

Set the Date Range
Choose a wide enough range to include all customer data—e.g., from your store's opening date (e.g., January 2024 to now).

Click Preview

DPOS will generate a list based on your selected date range.

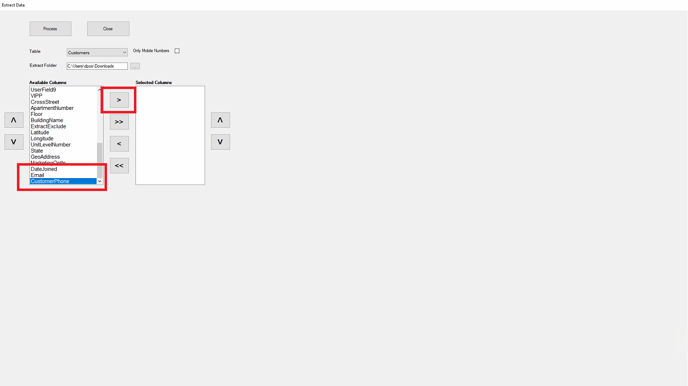
Option B: Using Data Extraction
Go to the Utilities Tab

Select "Data Extraction."
Choose Data Extraction from the Reports menu.

In the Table section, choose Customer.

Choose Fields to Extract

When prompted, make sure to tick:
- Phone Number
- Date Joined (optional but useful)
- Click the right arrow.
- When done, click the Process button.
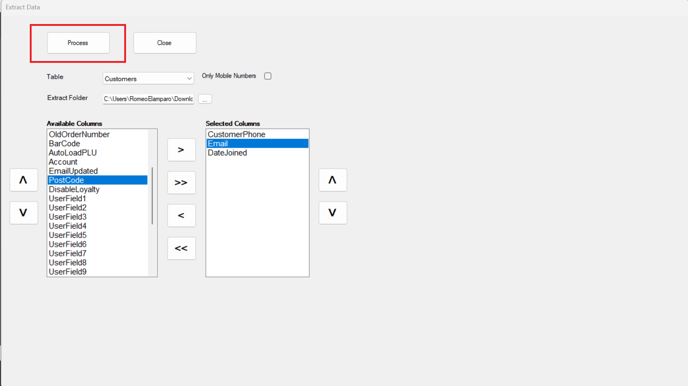
- Click OK.

Open the File

Note: In-store purchases will not have an associated email address unless manually collected by the store.
By following this guide, you can successfully export and manage customer contact data from DPOS. If you require further assistance, please reach out to our application support team for help.