Enable the Quick Pay Button in DPOS
This guide helps you enable the Quick Pay button in your store using DPOS. Stores can use this feature to speed up transactions by quickly processing payments.
How to Enable Quick Pay
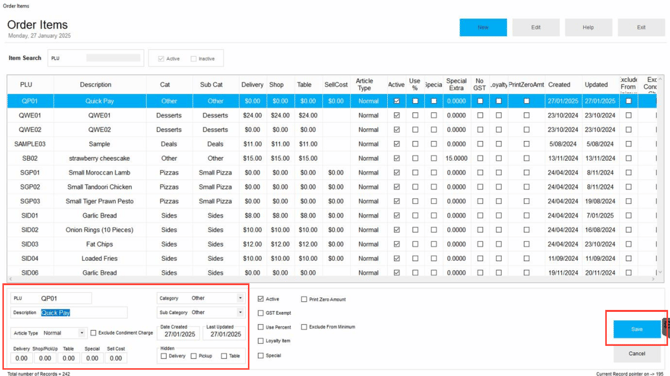
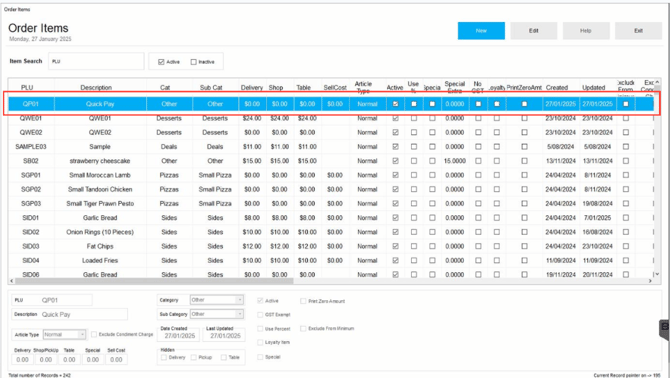
Step 1: Add Quick Pay as an Order Item
- Go to the Maintenance section and select Order Items.
- Click the New button to add a new item.
- In the PLU field, enter QP01.
- In the Description field, enter Quick Pay.
- Click Save to complete the process.
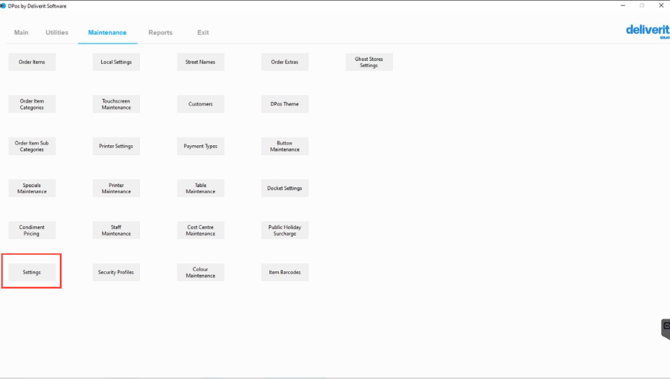
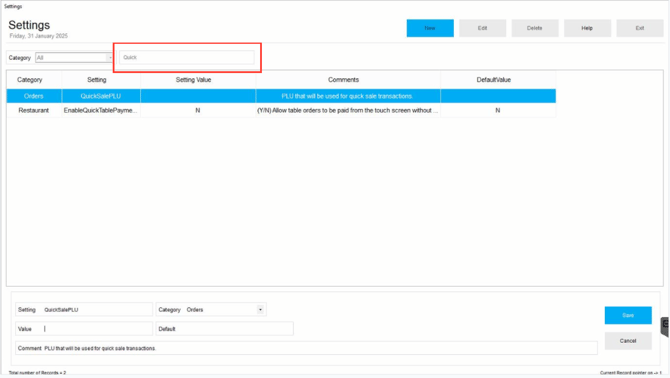
Step 2: Update Global Settings
- Return to the Maintenance menu and select Global Settings.
- In the search field, type Quick Sale PLU and click Edit.
- In the Value section, enter QP01 and click Save.
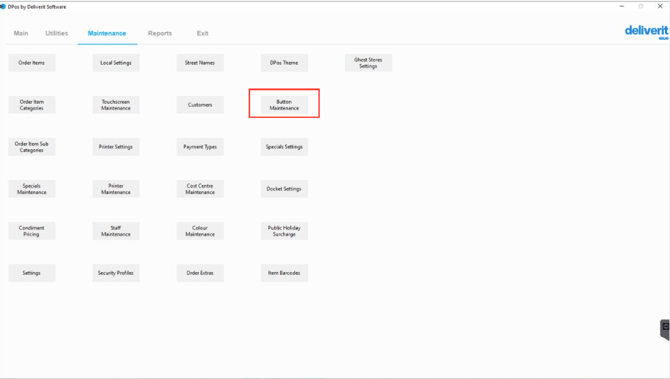
Step 3: Assign Quick Pay to a Button
- Navigate back to the Maintenance tab and select Button Maintenance.
- Identify a button that is not frequently used or can be replaced, then select it.
- Click Edit to modify the button.
- On the left side of the screen, select Quick Pay - Cash or Quick Pay - EFTPOS from the drop-down menu.
- Click Save to apply the changes.
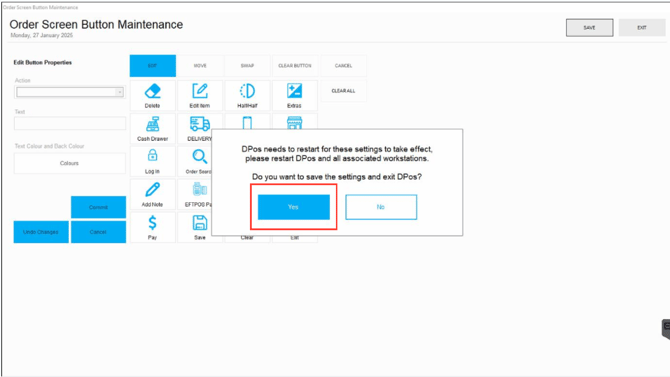
Restart DPOS:
A pop-up will appear prompting you to restart DPOS. Select Yes to restart the application.
Verify the Update:
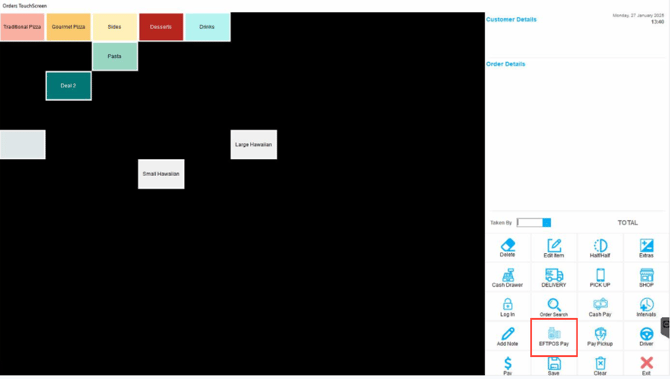
Go to the Orders section from the main menu and confirm that the Quick Pay button is now available on the Orders screen.
Using this guide ensures a faster checkout process in your store using DPOS.
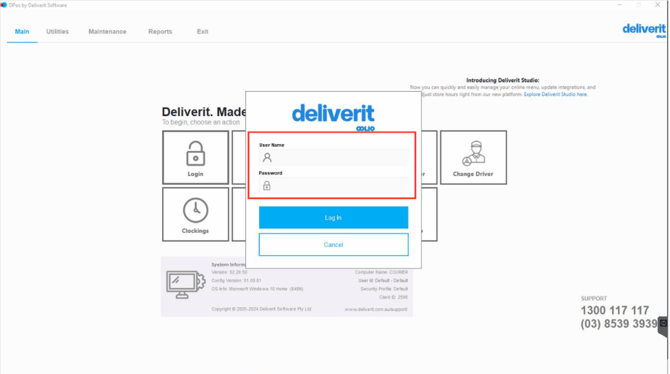
Access the DPos Application
Sign in to your DPos account.
Navigate to Maintenance
From the main menu, go to the "Maintenance" section.
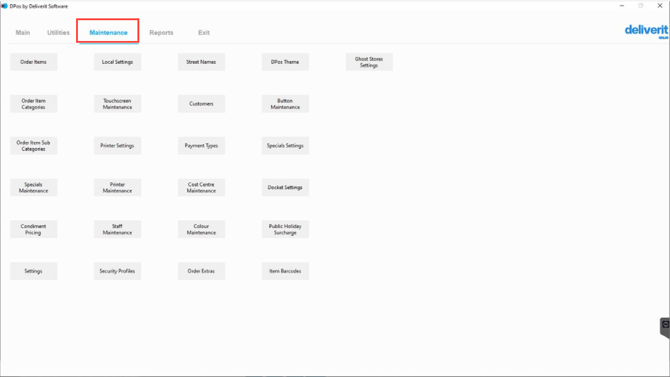
There are three steps to enable a Quick Pay Button
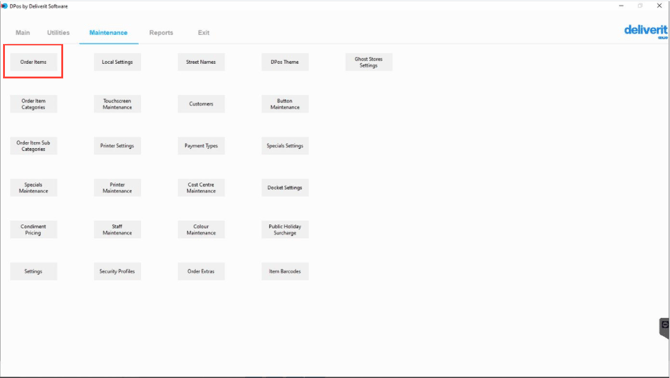
First is to Select the Order Items
Under the maintenance button, choose the "Order Items" option.
Click New
Click the "New" button to add a new item.
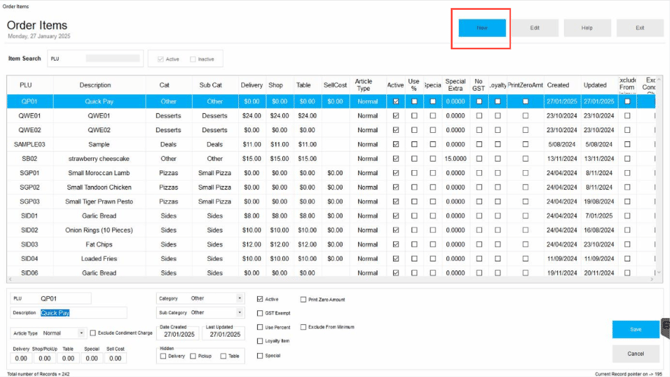
Enter PLU Code
In the PLU field, enter QP01. In the Description field, enter Quick Pay.
Click the "Save" button to complete the process.
The second step is going back to Maintenance
Go back to the Maintenance menu.
Navigate to Global Settings
Find and navigate to the "Global Settings" section.
Quickpay Configuration
In the search field, type "Quick Sale PLU".
Edit
Select and click the edit button.
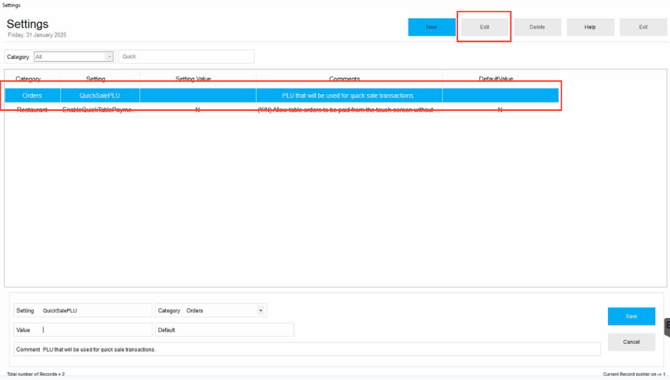
Set Value
In the value section, set the value to "QP01" and then click "Save"

The third step is to go back to Maintenance
Navigate back to the Maintenance tab.
Button Maintenance.
In the Maintenance menu, select Button Maintenance.
Choose a Button to Replace
Identify a button that is not frequently used or can be replaced. Select this button.

Click Edit
Click on the Edit button to modify the selected button.
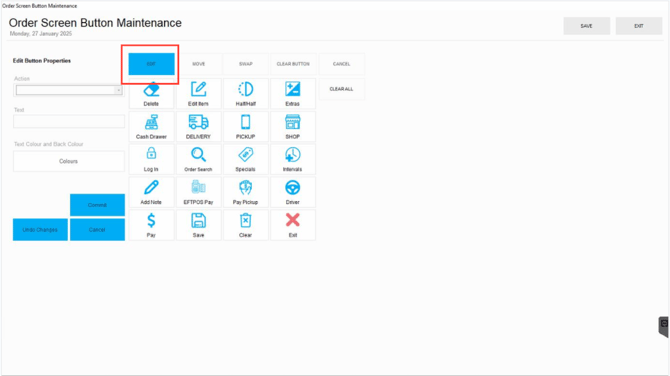
Access the Drop-Down Menu
Navigate to the left side of the screen to find the drop-down menu and select Quick Pay - Cash or Quick Pay - EFTPOS.

Save the Changes
Confirm your selection by committing and clicking the save button changes.
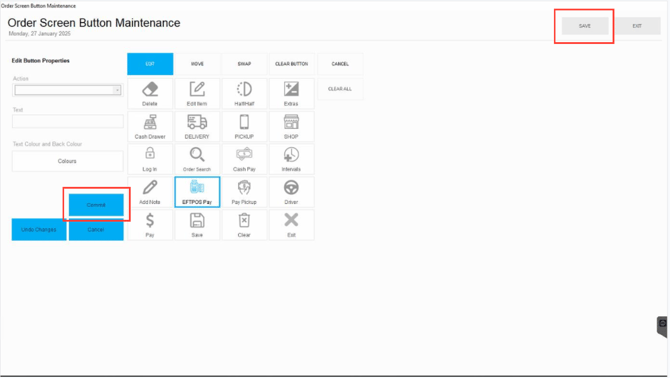
Restart DPos
A pop-up will appear prompting you to restart DPos to apply the changes. Select Yes to restart the application.
Confirm the New Button
Navigate to the Orders section from the main menu and confirm that the new Quick Pay button is available on the Orders screen.
By following these steps, you will be able to enable the quick sale button on DPos efficiently. If you need further assistance, simply click the blue chat icon at the bottom-right corner of the screen to connect directly with our Application Support Team.