How to Create a New Table Layout on DPOS (Restaurant)
Setting up a table layout in DPOS helps streamline restaurant service by organizing table sections and layouts clearly on your touchscreen. Follow the steps below to create a new table layout.
Note: First, make sure the table module is assigned to DPOS. Follow this guide for an easy step-by-step process. How to Enable Restaurant Module on DPOS.
Step-by-Step Guide
Log in to DPOS
Open the DPOS application and log in using your staff credentials.

Create a Backup (Recommended)
Before making any changes, it’s a good idea to back up your current settings.
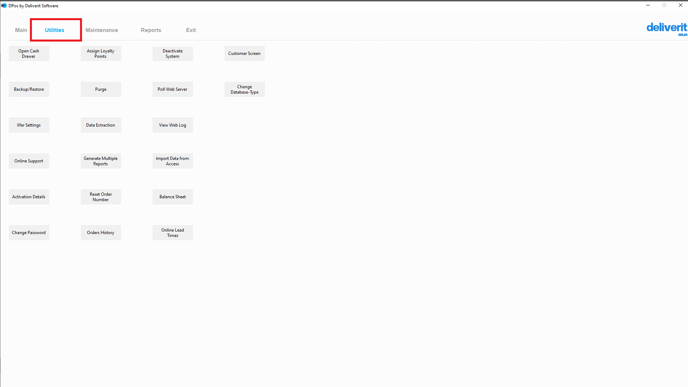
- Go to the Utilities tab.

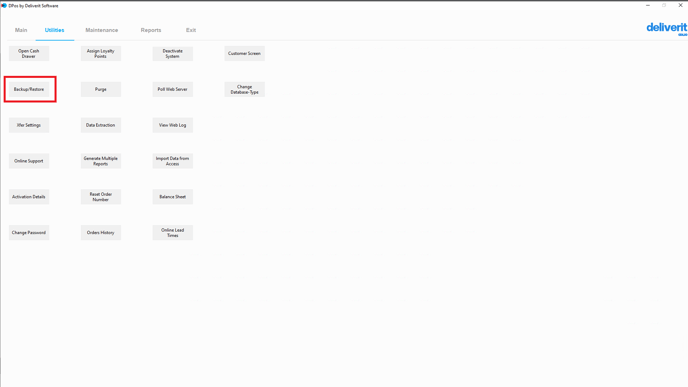
- Click Backup/Restore.

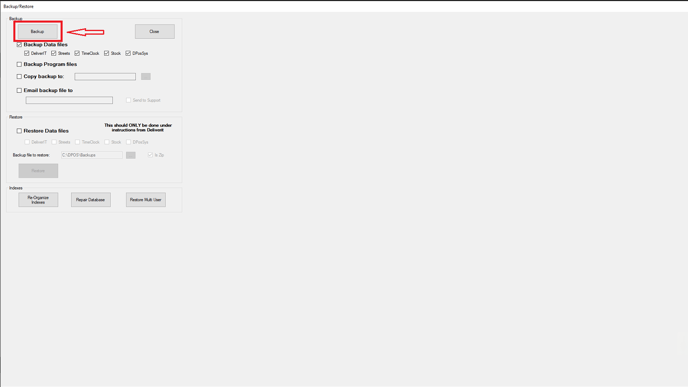
- Click the Backup button to save your current configuration.

Go to the Orders Section
From the main menu, tap on the Orders section.

Click the Edit Table Button
Tap the Edit Table button to open the layout configuration panel.

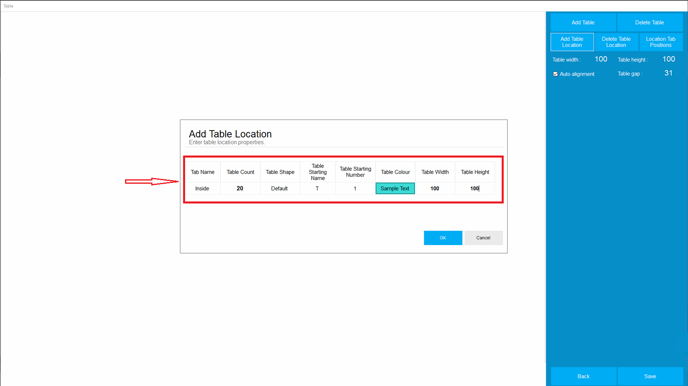
Click ‘Add Table Location.
Select Add Table Location to begin creating a new layout group.

Fill in the Table Layout Details
Enter the following fields to define your new layout:
- Tab Name – A label for the table section (e.g., "Inside", "Outside", "Courtyard").
- Table Count – Total number of tables to create in this layout.
- Table Shape – Choose from available shapes (e.g., Square (Default), Round).
- Table Starting Name – Prefix for table names (e.g., "Table", "T").
- Table Starting Number – The number to begin the sequence (e.g., 1).
- Table Colour – Select a colour for the table icons. (You can also assign a unique colour to each table for better visual organization.)
- Table Width – Set the width of each table.
- Table Height – Set the height of each table.

Click OK to Save
Once all details are filled in, click OK to save the new table layout.

Restart DPOS
To apply the changes, restart the DPOS application.
Note: The new table layout will now be visible under the Orders section. You can return to the Edit Table screen at any time to adjust the layout as needed.

By following these steps, you'll be able to create and customize your DPOS restaurant table layout with ease. If you need further assistance, please contact our application support team.