
-
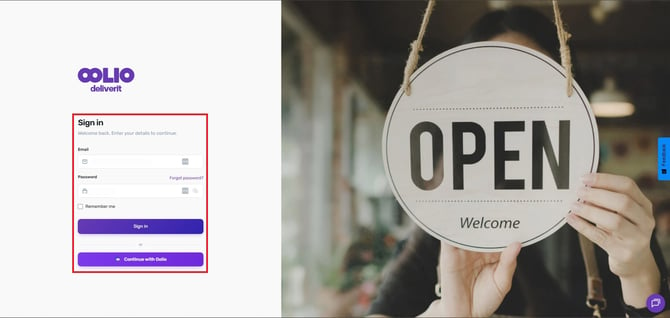
Go to my.deliverit.com.au and enter your login details.
-
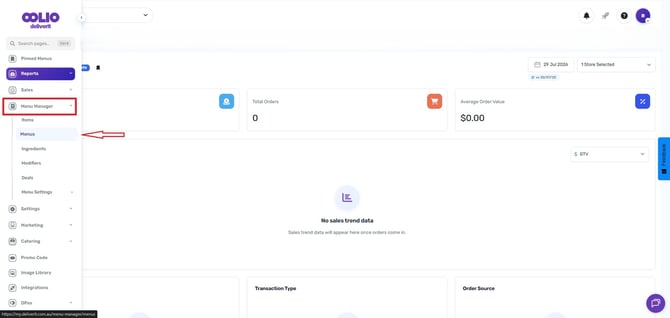
Navigate to the Menu Manager:
Once logged in, find the "Menu Manager" section and click on the "Menus" tab.
-
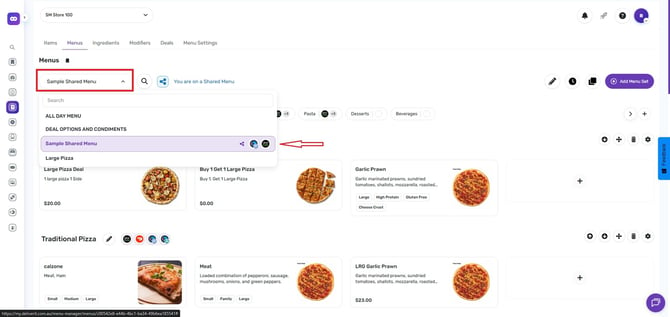
Choose a menu to Put the Menu Category:
Choose where you want your new menu category to appear.
-
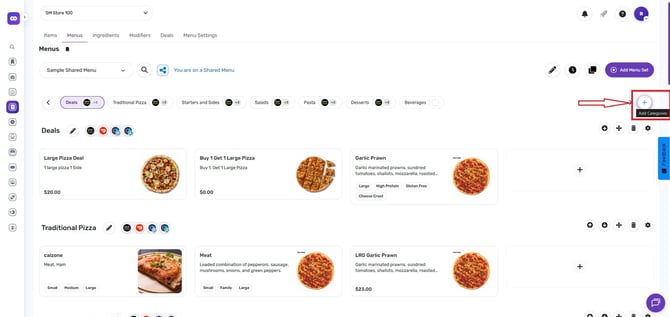
Create a New Menu:
On the right side of the page, click the (+) icon to start creating a new menu.
-
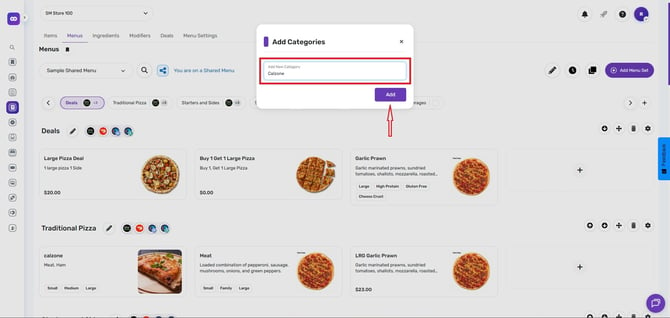
Add a Category Name:
Type in the name of your new category and click the "Add" button.
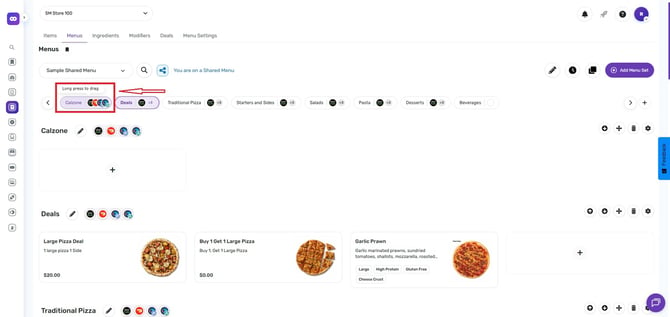
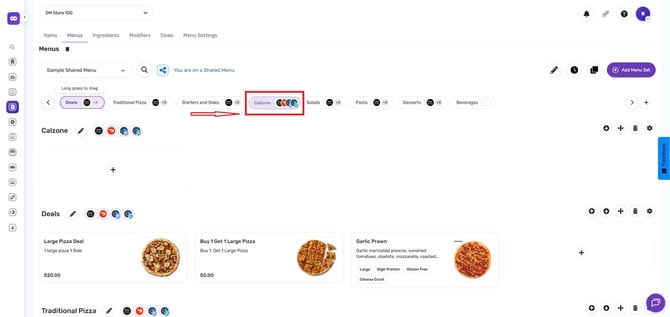
Note: You can long-press, drag and drop the menu category to reposition as required.
-
Add Items to the Menu Category:
Click the (+) icon to add items under your new category.
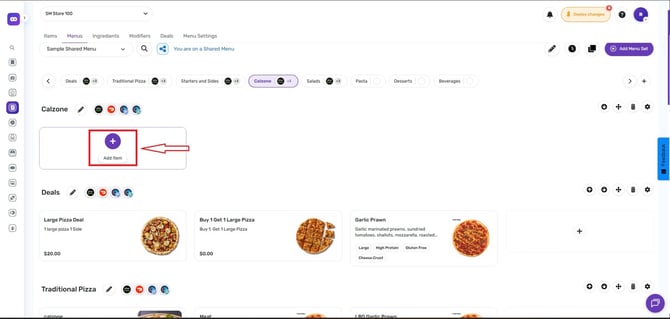
Use the search bar to find items by their PLU (Item Code) or name.
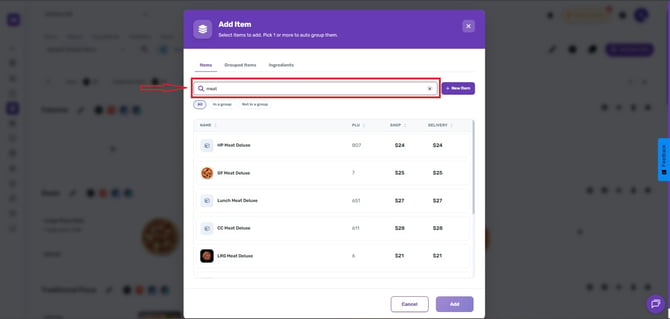
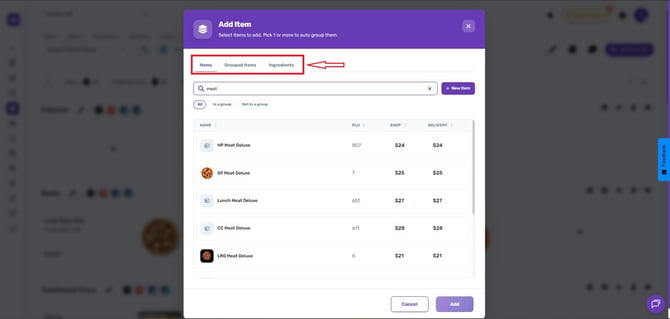
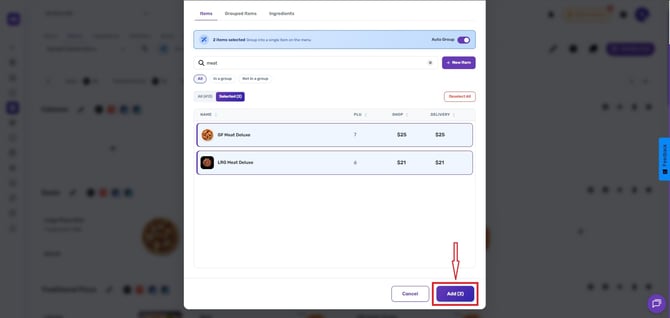
You can add single or multiple items and include their ingredients.
-
Click Save:
Once you're done, click the "Save" button.
-
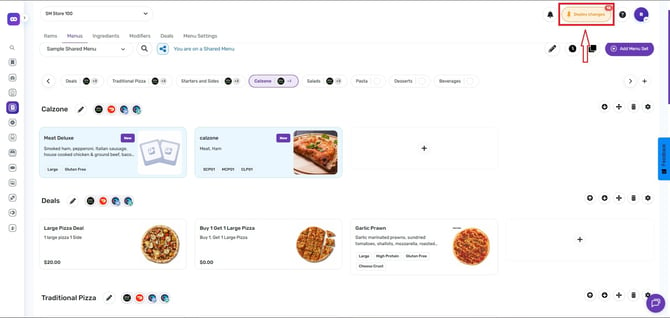
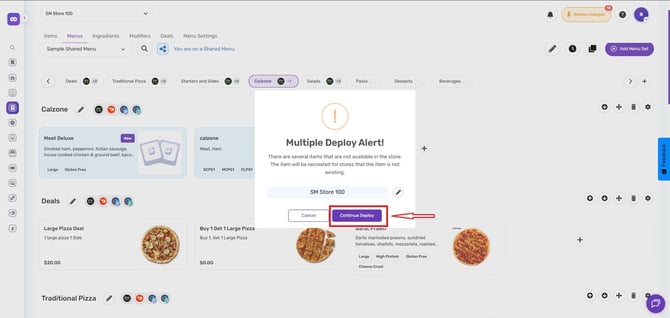
Deploy Your Changes:
Go to the rocket icon and deploy your changes.
-
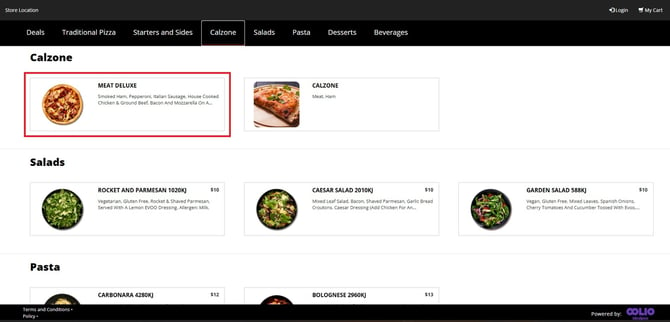
Reload the Website Browser:
Reload your web browser to see if the new menu category and items are displayed correctly.
Advanced Menu Functions
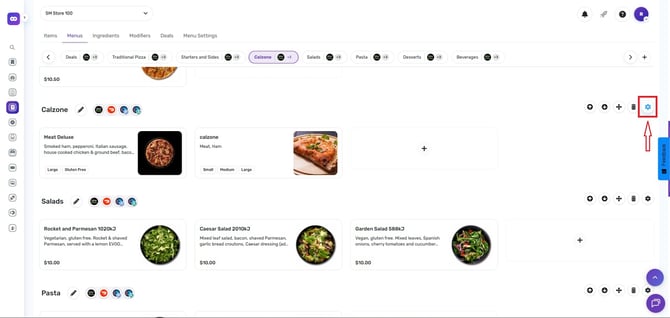
Under the Settings icon,
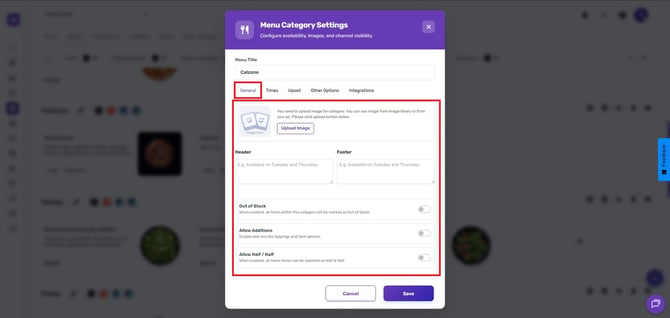
You can edit in the General tab.
-
Image.
-
Header and Footer.
-
Out of stock.
-
Allow Additions.
-
and Allow Half/Half for this menu.
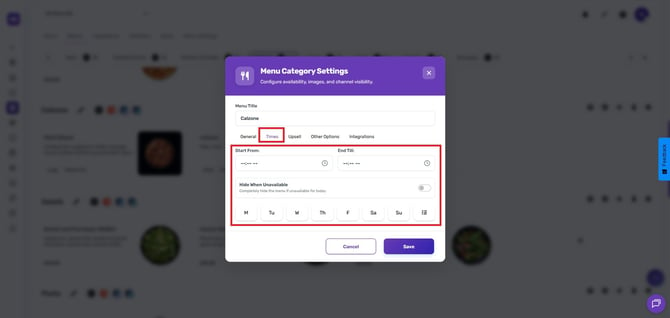
On the Times tab, you can edit the availability of the items on this menu by Time or Day.
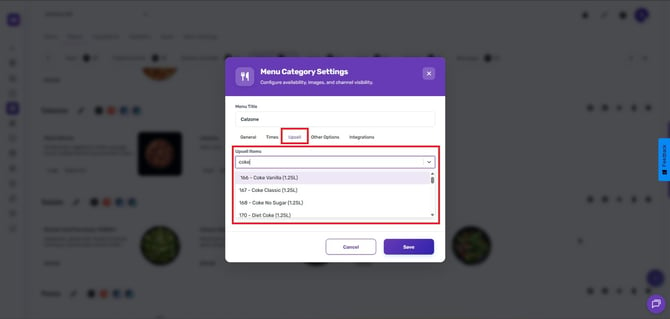
The Upsell tab allows you to select items to Upsell if a customer adds an item to their cart on this menu.
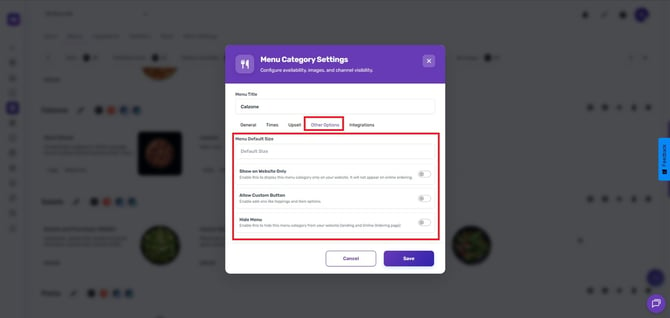
Under the Other Options tab, you can:
-
Select the Default Size for menu items in this section.
-
To Show on Website Only.
-
You can allow customers to customise menu items by selecting the Allow Custom button.
-
And you can also hide the Menu.
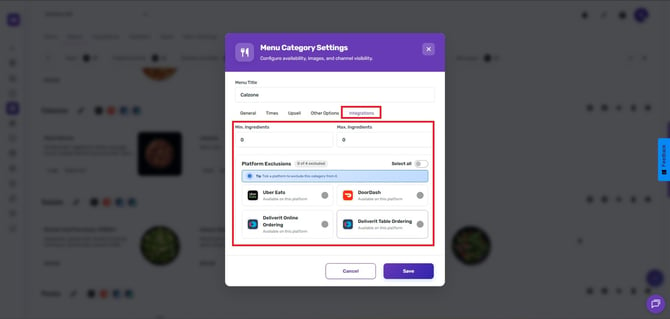
In the Integrations tab, you can:
-
set the minimum and maximum ingredients,
-
You can exclude platforms
- Click Save.
By following these steps, you can easily add a new menu category in Deliverit Studio. If you need further assistance, simply click the blue chat icon at the bottom-right corner of the screen to connect directly with our Application Support Team.