
Updating an Ingredient
Log In:
Go to my.deliverit.com.au and log in with your DPOS Cloud account credentials.

Navigate to Menu Manager:
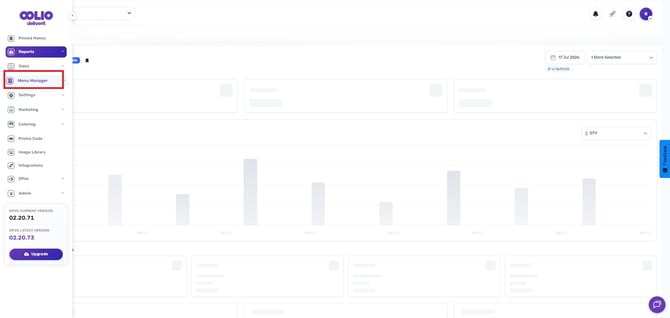
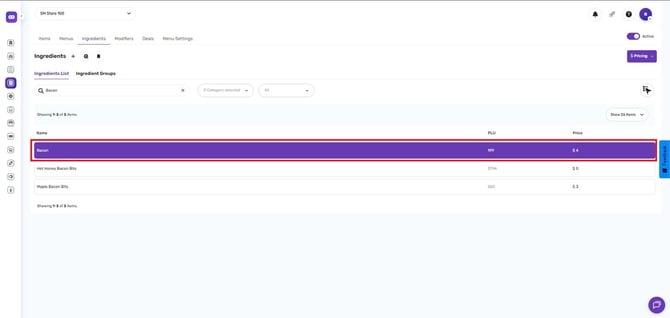
Click on the Ingredients.
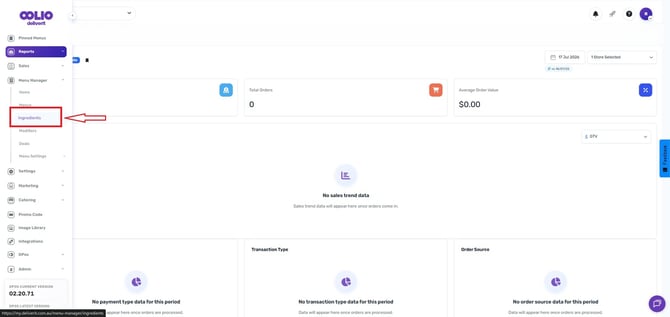
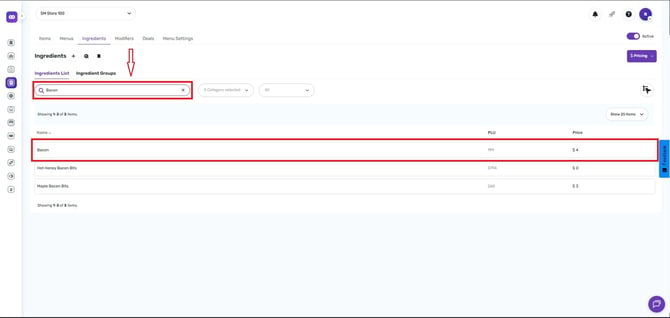
Find the Ingredient:
You can search for the ingredient by its name or PLU (Product Code).
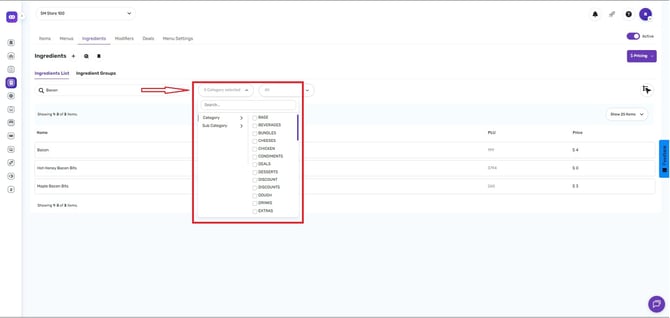
Alternatively, you can filter the list by Category to find the ingredient you want to update.
Click on the ingredient you want to update.
Edit the Price:
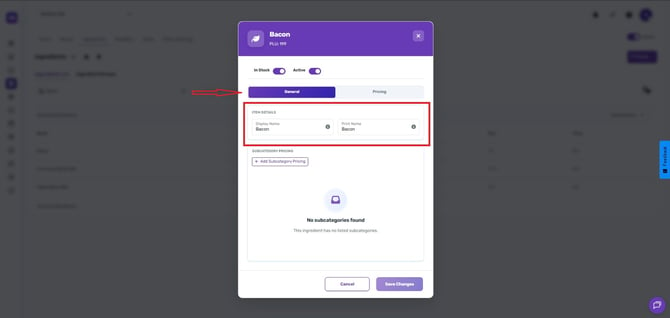
You can also update the display and print names in the General tab.
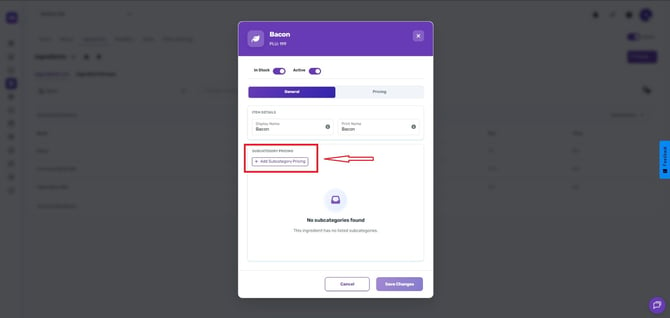
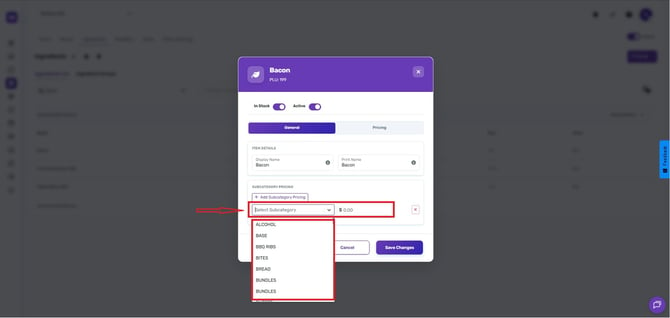
You can also add a subcategory and configure its pricing by clicking the Add Subcategory Pricing button.
In the Pricing tab, if you require the same price across all platforms, toggle the Apply All option.
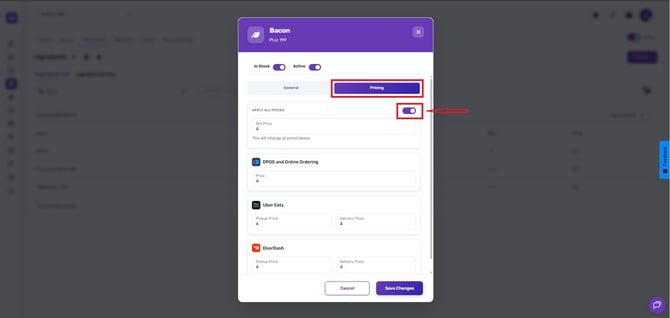
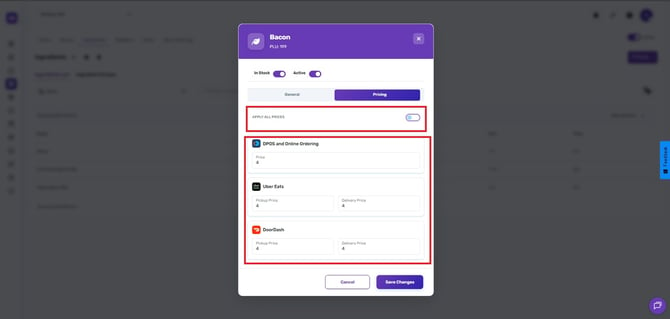
If you require different prices for various platforms, make sure the Apply All option is toggled off and then set the prices individually.
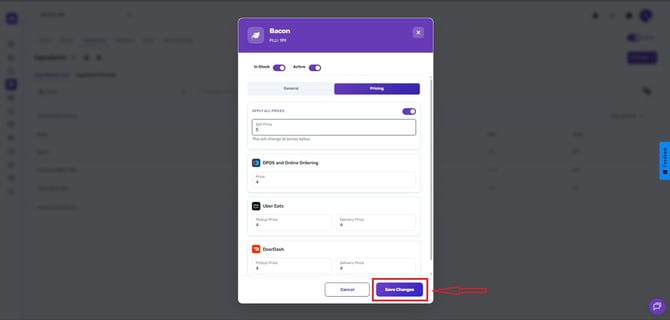
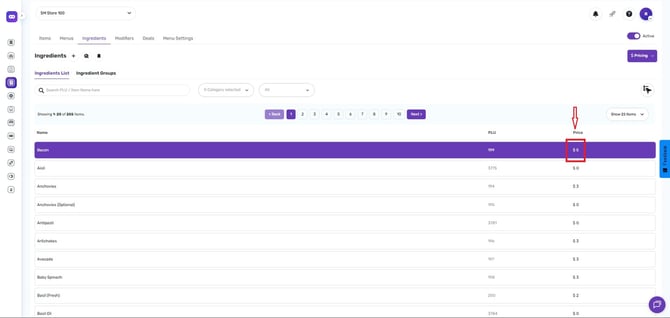
Click the Save button when you're done.
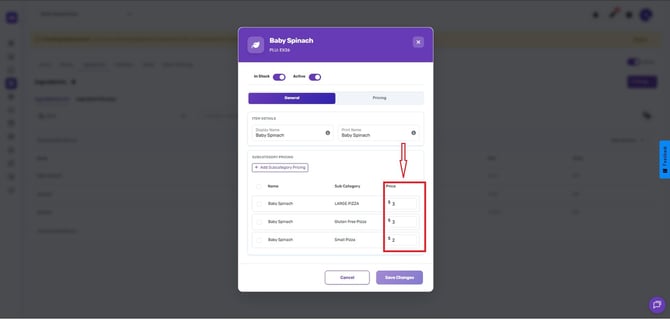
Note: For ingredients that have a pricing structure based on size, these can be updated by editing prices for each size as shown below.
Deploy the Changes:
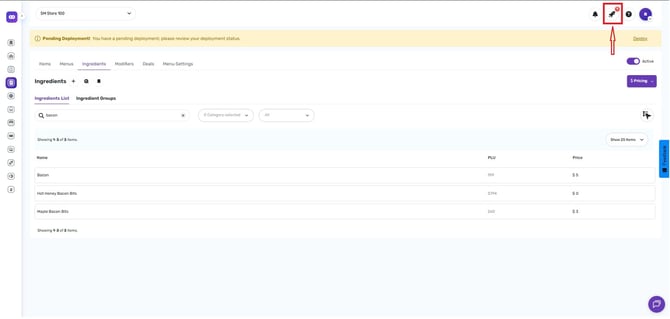
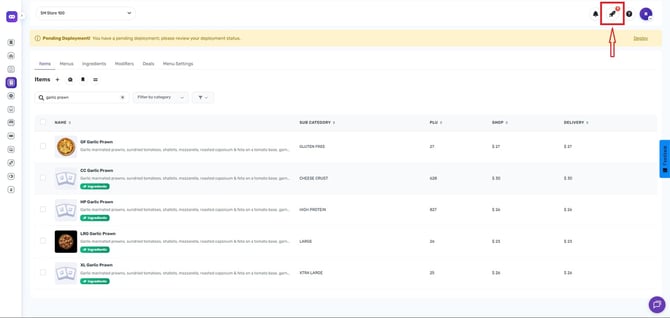
After saving, click the Rocket Icon in the upper right corner of the page.
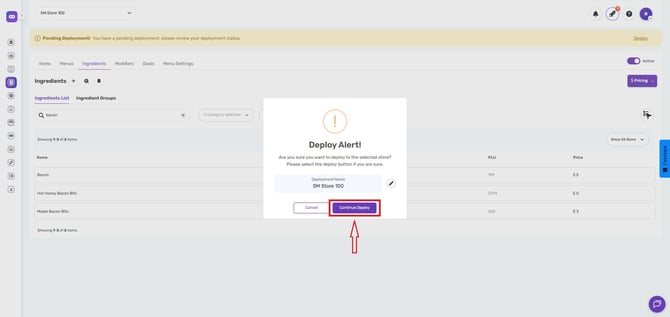
Click the Deploy button to apply the changes.
Refresh Platforms:
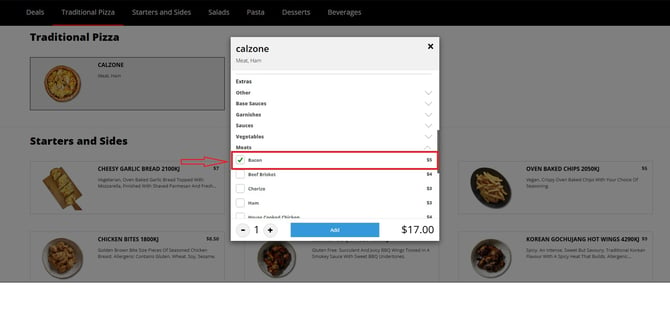
Once done, reload the website browser to verify the new updates.
Creating a New Ingredient Group:
Navigate to Menu Manager:
%20Group%20for%20Online%20Ordering%20via%20Deliverit%20Studio/12.jpg?width=670&height=318&name=12.jpg)
Click on the Ingredients tab. %20Group%20for%20Online%20Ordering%20via%20Deliverit%20Studio/13.jpg?width=670&height=318&name=13.jpg)
Click on the Ingredient Groups tab. %20Group%20for%20Online%20Ordering%20via%20Deliverit%20Studio/14.jpg?width=670&height=318&name=14.jpg)
Add Default Group:
-
This is a one-time action that creates a default "All Ingredients" group.
-
All the current ingredients will be automatically added to this group.
-
New ingredients you create will also be added to this group.
-
Use this option if you do not need different grouping of Ingredients
%20Group%20for%20Online%20Ordering%20via%20Deliverit%20Studio/15.jpg?width=670&height=318&name=15.jpg)
%20Group%20for%20Online%20Ordering%20via%20Deliverit%20Studio/16.jpg?width=670&height=318&name=16.jpg)
Click the Add Group Name button. %20Group%20for%20Online%20Ordering%20via%20Deliverit%20Studio/17.jpg?width=670&height=318&name=17.jpg)
Select Add Group Name.
Enter the desired name for the new extras (condiment) group, then click Next.%20Group%20for%20Online%20Ordering%20via%20Deliverit%20Studio/18.jpg?width=670&height=318&name=18.jpg)
Add Ingredients to the Group:
You will see the Ingredients List on the left and the Selected Ingredients on the right.
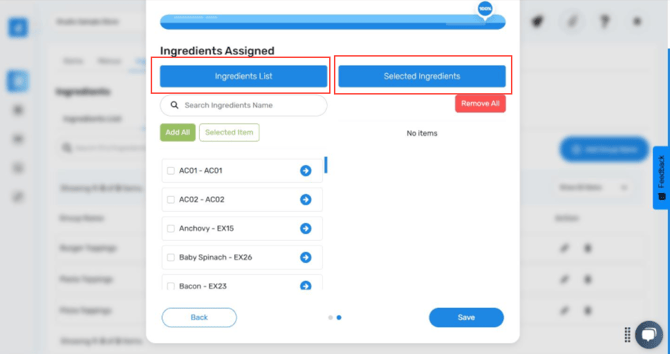
Add Ingredients to the Group
Choose the ingredients you want to include in the group.
You can select the Add all button.%20Group%20for%20Online%20Ordering%20via%20Deliverit%20Studio/19.jpg?width=670&height=319&name=19.jpg)
Or the Selected Items. Click the specific ingredient, then click the Selected Item button.%20Group%20for%20Online%20Ordering%20via%20Deliverit%20Studio/21.jpg?width=670&height=318&name=21.jpg)
Click the Save button to finalize the group setup. %20Group%20for%20Online%20Ordering%20via%20Deliverit%20Studio/22.jpg?width=670&height=319&name=22.jpg)
To remove an ingredient:
-
Remove all - Click the Remove All button
-
Individual - Click the arrow button.
%20Group%20for%20Online%20Ordering%20via%20Deliverit%20Studio/23.jpg?width=670&height=319&name=23.jpg)
%20Group%20for%20Online%20Ordering%20via%20Deliverit%20Studio/24.jpg?width=670&height=319&name=24.jpg)
Confirmation
A pop-up will appear, saying the ingredient group is created. Click Finish. %20Group%20for%20Online%20Ordering%20via%20Deliverit%20Studio/25.jpg?width=670&height=318&name=25.jpg)
Edit an Existing Ingredient Group:
Under the Ingredient Groups tab, click the Edit icon next to the group you wish to update.
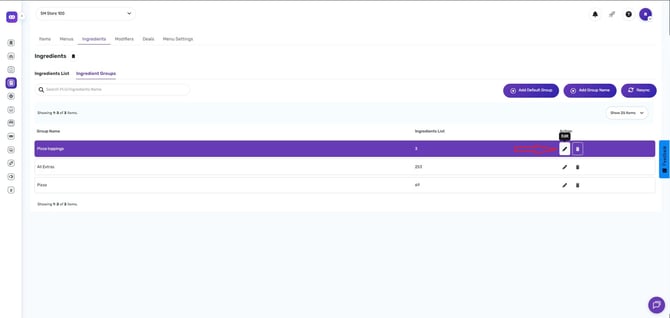
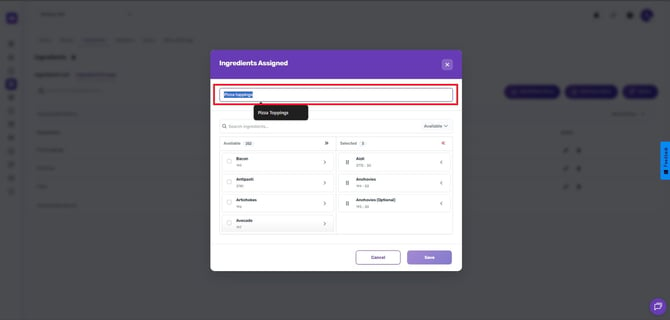
You can also update the name of the group.
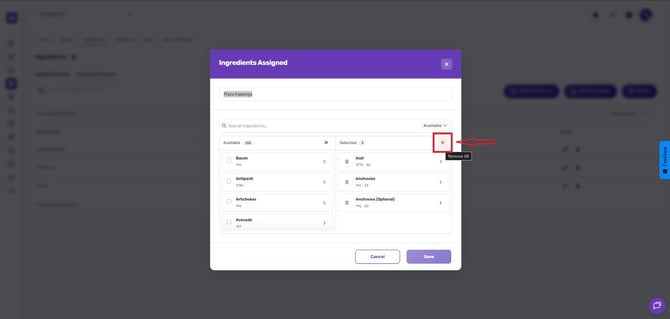
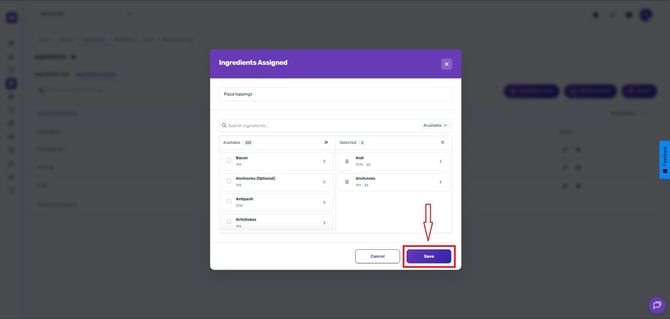
To remove all selected ingredients, click Remove All.
Make the necessary changes, then click Save.
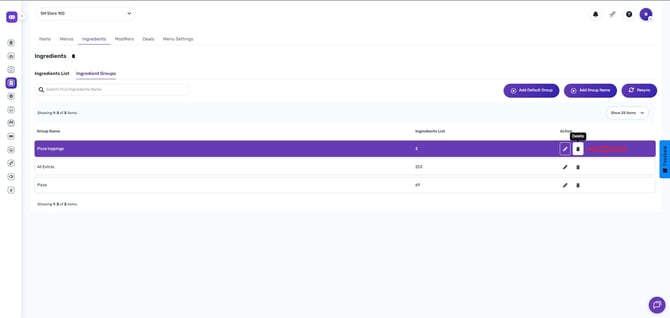
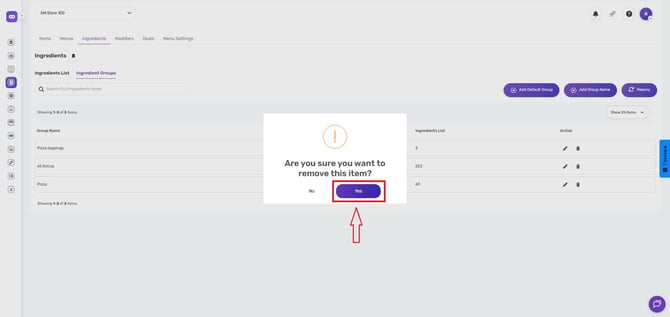
To delete the entire group, click the Delete icon and confirm by clicking Yes.
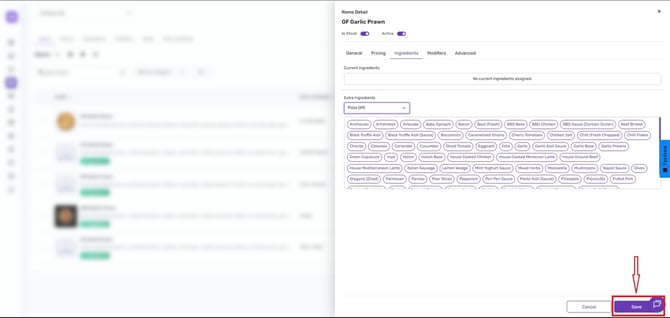
Assign an Ingredient Group to Items:
Navigate to the Items section on the left-hand navigation bar.
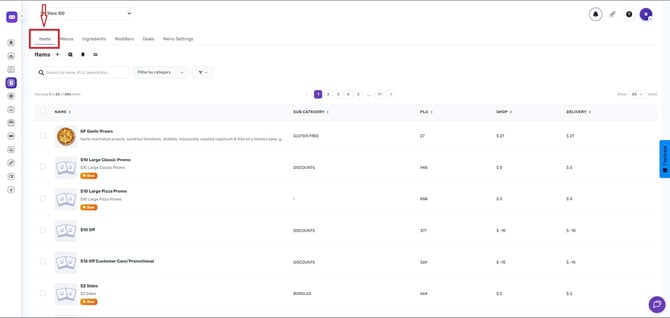
Enter the item name or product code in the search field.
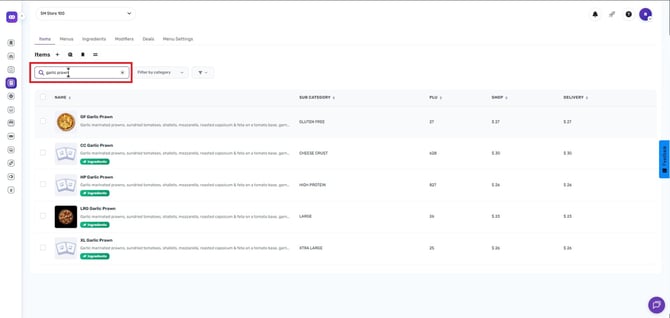
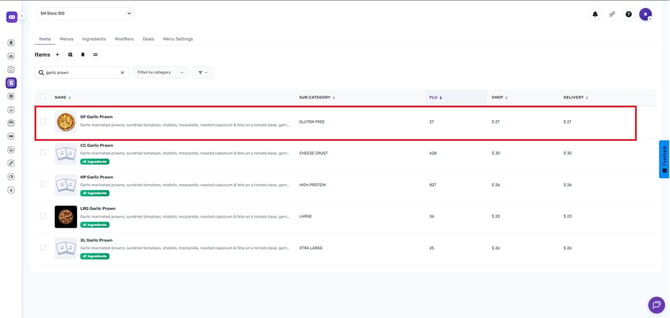
You can select the specific item to which you want to assign the ingredient group.
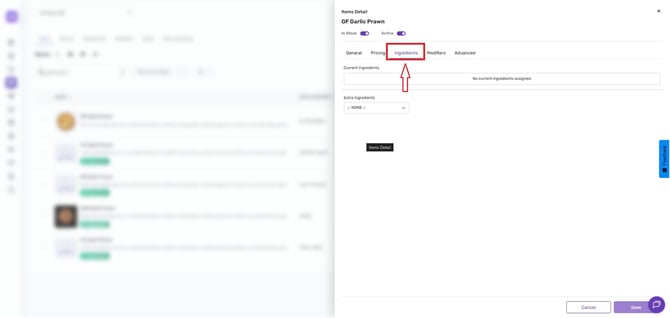
Click the Ingredients Tab.
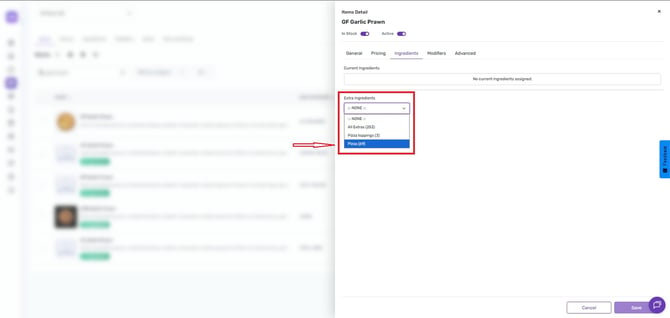
From the drop-down menu, you can select the appropriate ingredient group.
Click the Save button.
Deploy the Changes:
After saving, click the Rocket icon and then click the Deploy button to apply the changes.
Review the Changes:
Refresh your website to see if the changes have been applied.
By following these steps, you will be able to utilise Add/Update/Assign Ingredients functions in Deliverit Studio efficiently. If you need further assistance, simply click the blue chat icon at the bottom-right corner of the screen to connect directly with our Application Support Team.