How to Add Categories and Subcategories on Deliverit Studio
✅ For Category
✅ Menu Manager → Items tab
✅ Click Add Item (➕)
✅ Type new Category name → Enter
✅ Complete item fields
✅ In the Subcategory section, click Add Subcategory
✅ Type new Subcategory name → Enter
✅ Save
✅ Deploy changes
Note:
- Creating a new Category and Subcategory is facilitated in the Add New Item Wizard, which is explained in detail on this link.
- Existing Category and Subcategory names cannot be changed.
- Existing items cannot be reassigned to different Categories and Subcategories
Adding a New Category
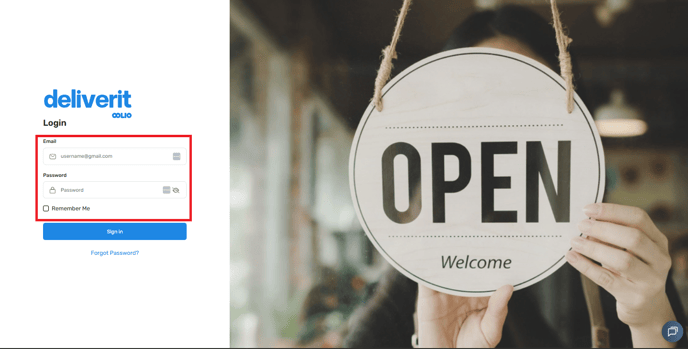
Log in to Deliverit Studio
- Go to my.deliverit.com.au
- Log in using your username and password
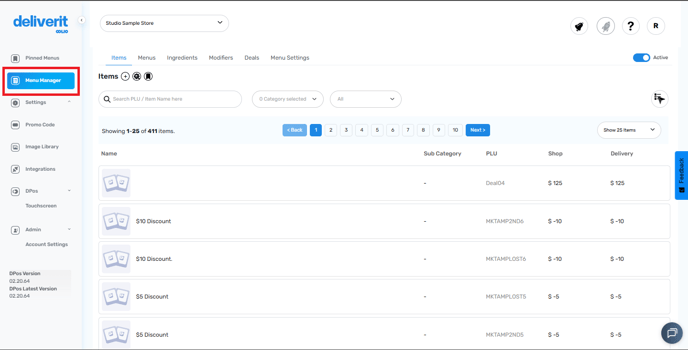
Open Menu Manager
- From the left-hand menu, click Menu Manager
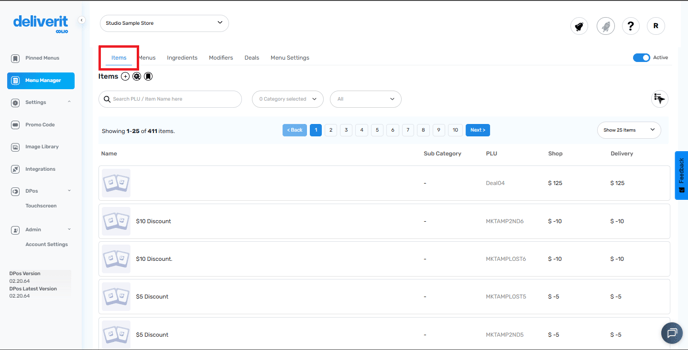
Go to the Items Tab
- Inside Menu Manager, click the Items tab at the top
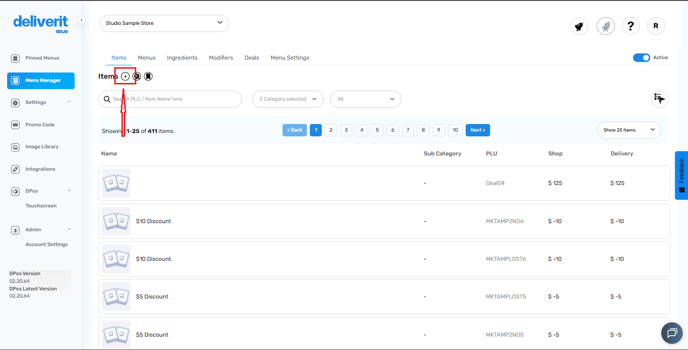
Start Adding a New Item
- Click the ➕ (Add Item) button to open the item setup page
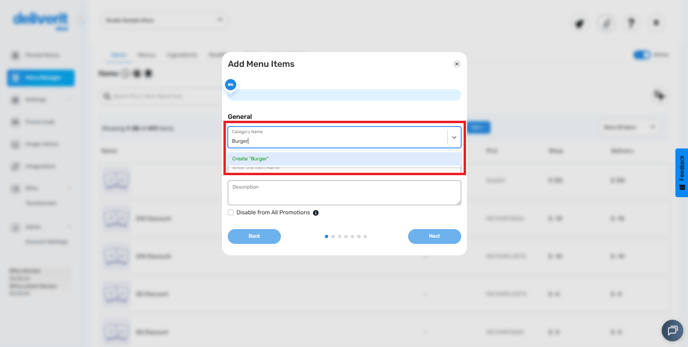
Create a New Category
- In the Category field, type the name of your new category
- Press Enter — this will automatically create and add the new category to your list
Fill In Item Details
- Complete the other required fields for your new item (like name, price, description)
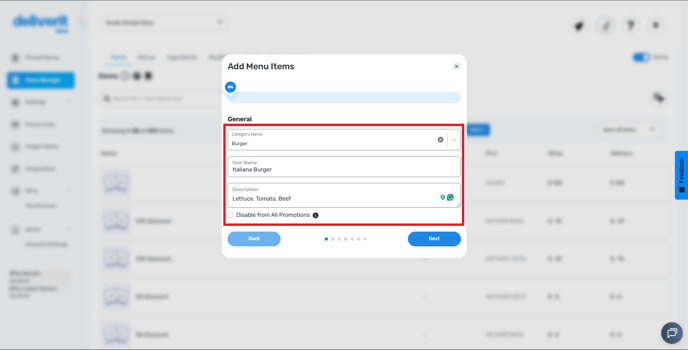
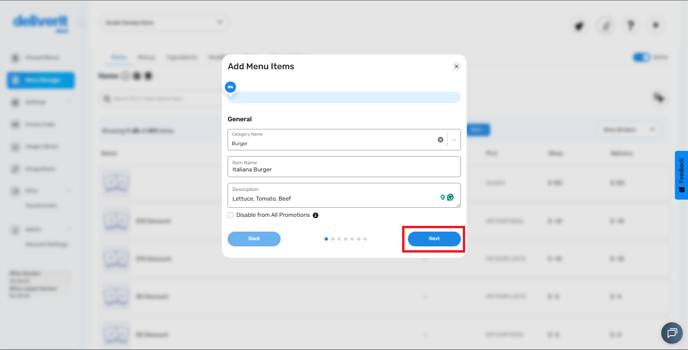
- Click Next to proceed
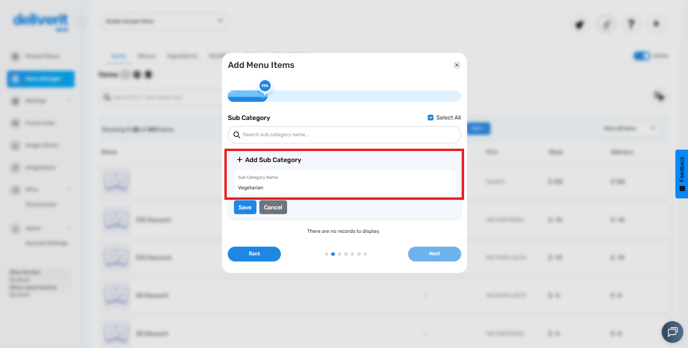
Adding a Subcategory
After creating the category and completing the item details, click Next to move on to the subcategory section.
Click Add Subcategory
- In the Subcategory section, click the Add Subcategory
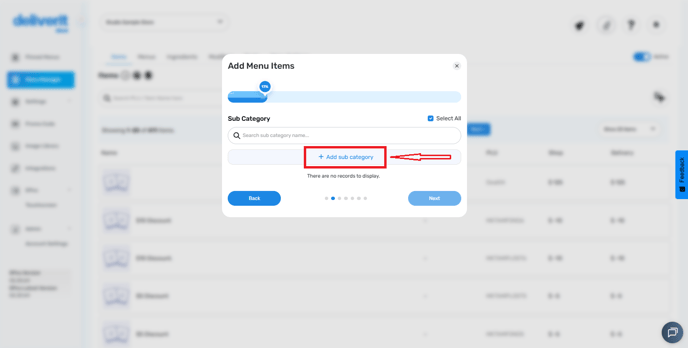
Type the Subcategory Name
- Enter your desired subcategory name
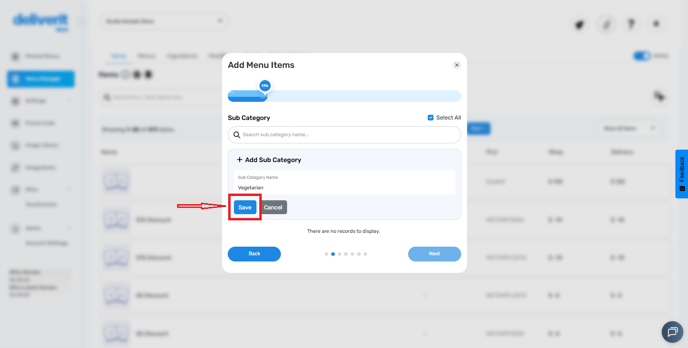
Save Your Changes
- Click Save to finalise your menu updates
Complete all the other required fields.
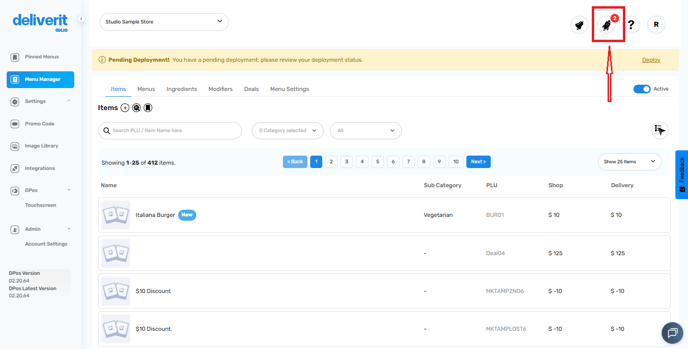
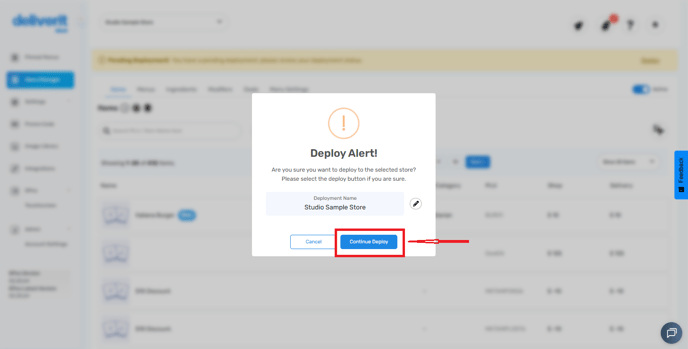
Deploy changes
- Go to the rocket icon and hit deploy.
Tips & Notes
- Keep category names simple and easy to understand (e.g., “Pizzas”, ''Burger'', “Drinks”).
- Use subcategories for grouping similar items (e.g., “Vegetarian”, “Meat Lovers” under “Pizzas”).
- Avoid creating duplicate categories—check existing ones first.
- Always deploy your menu after making changes if you want them visible online right away.
By following these steps, you can easily create new categories and subcategories in Deliverit Studio. If you need further assistance, simply click the blue chat icon at the bottom-right corner of the screen to connect directly with our Application Support Team.