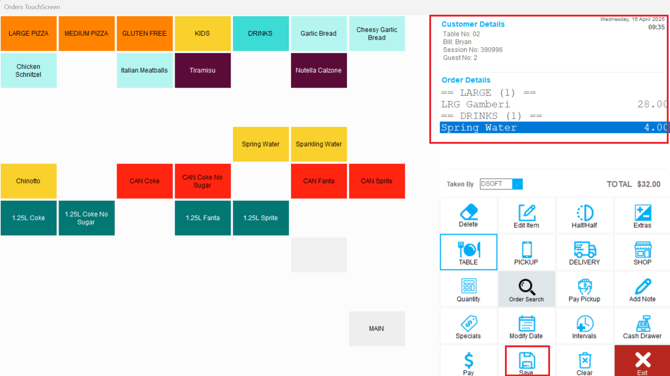
DPOS lets you create individual bills with just a few taps. Here’s how to do it.
✅Go to the Table transaction.
✅ Select the table from the layout
✅ Tap the Add Bill button
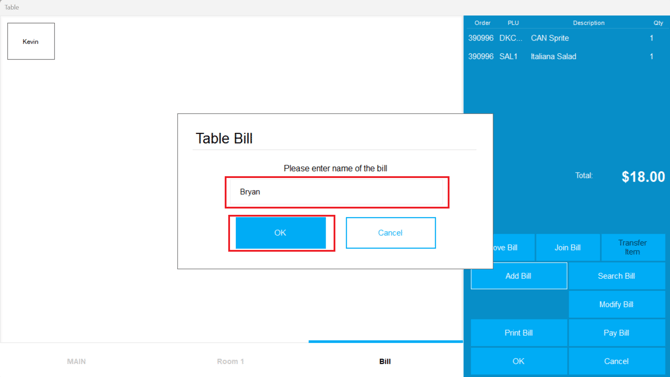
✅ Enter a bill name (e.g., "John" or "Group A")
✅ Tap OK to confirm
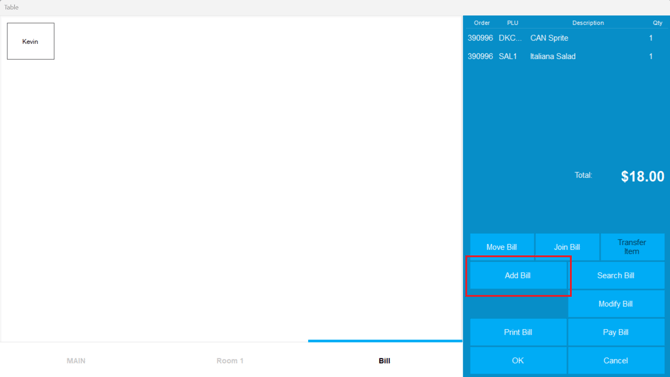
✅ Take the order for that bill
✅ Tap Save when finished
Tip: You can create multiple bills under one table — perfect for groups who want to pay separately.
Step-by-Step Instructions
Go to Table Transaction
Navigate to the Table payment section.
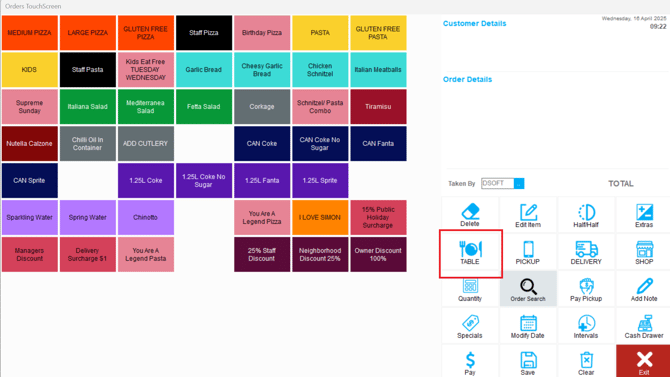
Select the Table
From the table layout, tap on the table you want to add a bill to.
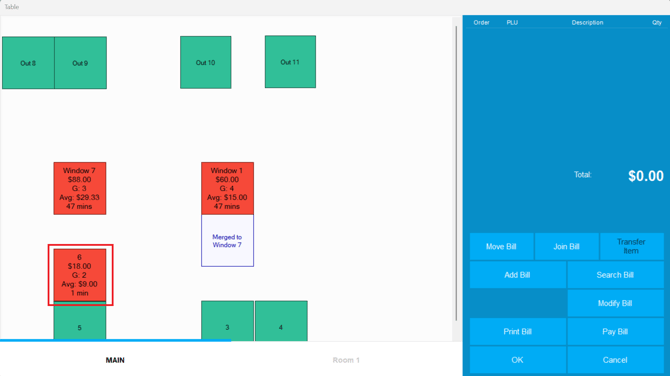
Tap the ‘Add Bill’ Button
On the table order screen, tap the Add Bill button (usually near the top or bottom of the screen).
Name the Bill
A pop-up will appear asking for the bill name (e.g., John, Group A, etc.).
Enter the name and tap OK.
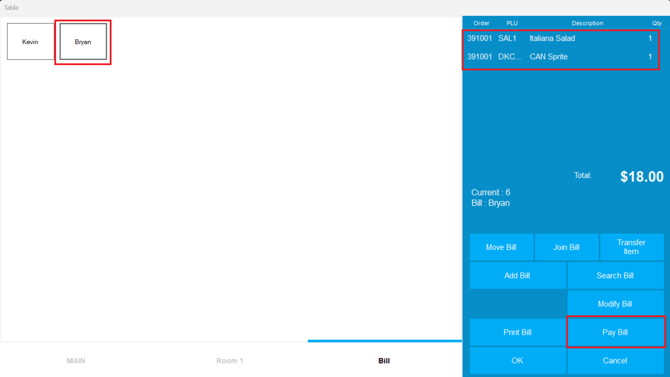
Take the Order
Begin entering the items for the bill as usual.
Once done, tap Save to store the bill under the selected table.
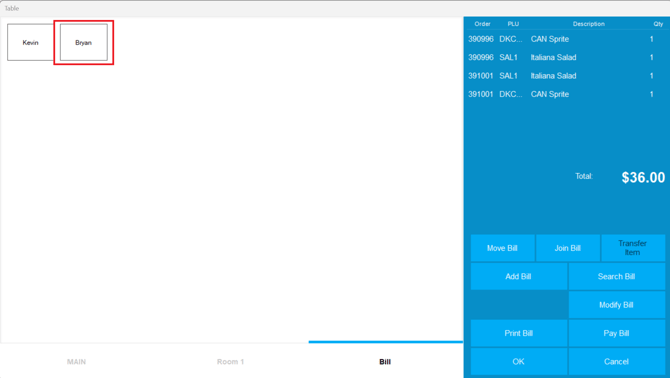
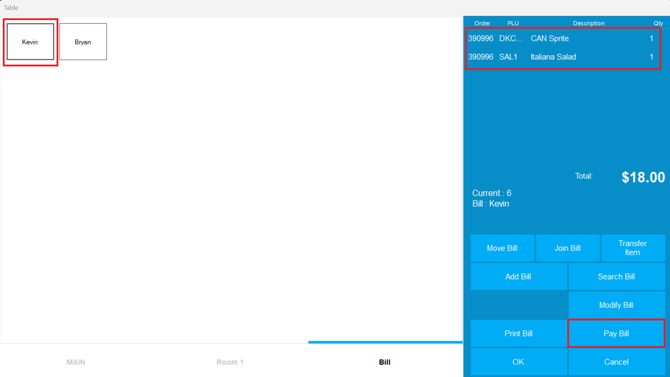
Note: To close the table, each bill must be paid off first.
By following these steps, you can easily assign a bill to a table in the DPOS application. If you need further assistance, simply click the blue chat icon at the bottom-right corner of the screen to connect directly with our Application Support Team.