How to Self-Onboard to the DoorDash Marketplace Using Deliverit Studio (New)
🟩 Preparation
-
Confirm that the Deliverit team has completed the pre-integration setup
-
If unsure, contact Deliverit Support before starting
🟩 Log in to Deliverit Studio
-
Go to my.deliverit.com.au
-
Sign in using your DPOS Cloud credentials
🟩 Access the Integrations Page
-
From the left menu, click Integrations
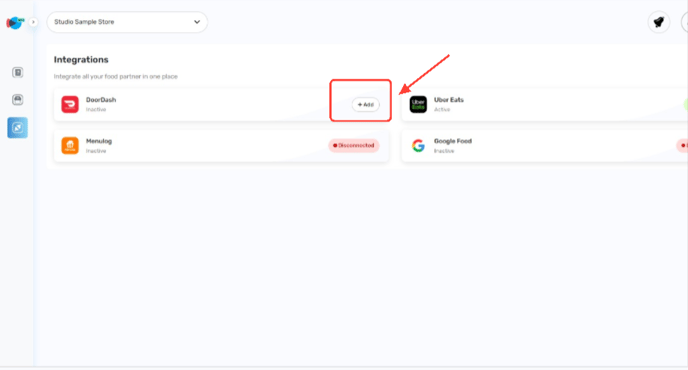
🟩 Add DoorDash Integration
-
Click Add next to DoorDash
-
A consent pop-up will appear
-
Click Continue to proceed or Cancel to exit
🟩 Log in to DoorDash
-
You will be redirected to the DoorDash Login page
-
Sign in with your Business Admin credentials
-
⚠️ Only Business Admin logins work – others will trigger an error
-
🟩 Select Store Location
-
After logging in, a Sync Location pop-up appears
-
Select your store from the dropdown
-
Only one location will appear if you manage one store
-
Multiple stores will show all available options
-
-
Click Continue to sync the store
-
Click Cancel to exit and return to the Integration page
🟩 Validate the Menu
-
The system will now validate your menu (takes ~5 minutes)
-
No action is needed unless you see an error
-
Common validation errors:
-
❌ Empty deal selection
-
❌ Duplicate deal order values
-
❌ Empty condiment group
-
❌ Empty menu category
-
❌ Missing trading hours
-
❌ Onboarding not requested in Client Admin
-
-
📞 Contact application support if any of these appear
🟩 Retry Menu Validation (If Needed)
-
After issues are fixed, return to Integrations
-
Click Update Menu to re-run the validation
🟩 Confirm Successful Integration
-
Once complete, you will see a Success message
-
Click Back to Integration
-
DoorDash will now display as Connected
Prepare for Integration
Important: Ensure the necessary integration work has been completed by the Deliverit team before attempting this process. Contact the Deliverit support team if you are unsure.
Log in to Deliverit Studio
- Open your browser and go to my.deliverit.com.au.
- Log in using your DPOS Cloud account credentials.

Access the Integrations Section
- From the left-hand navigation bar, select the Integrations tab.
Add the DoorDash Integration
- Click the Add button next to DoorDash.
- A Consent Popup will appear. This serves as a reminder that you are about to proceed with the self-onboarding process.
- Click Continue to proceed or click Cancel to exit the process.

Log in to DoorDash
- After clicking Continue, you will be redirected to the DoorDash Login Page.
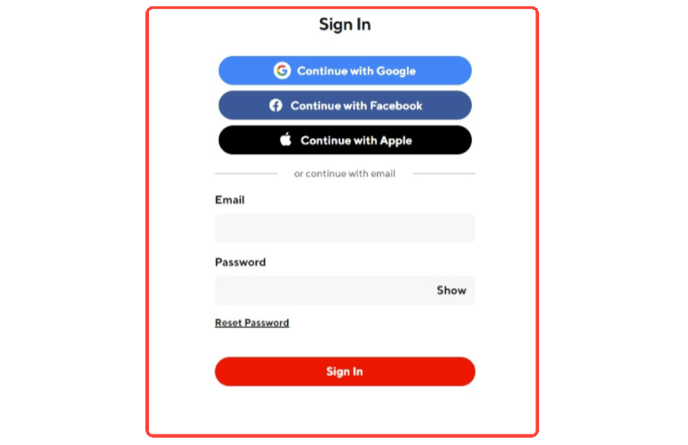
- Enter your DoorDash Business Admin credentials.
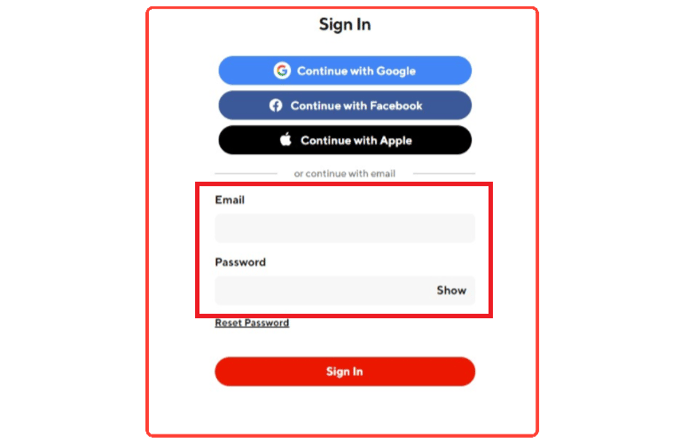
Note: Only credentials for a Business Admin User will work. Using other accounts will result in an error pop-up.
- Click Sign In to proceed.

Select a Store Location
- After signing in, a Sync Location pop-up will appear.
- Choose the correct store location from the dropdown list.

- If you manage only one store, you will see only that store in the list.
- If you manage multiple stores, you should see all available store locations.
- Click Continue to sync the selected store.
- If you click Cancel, you will be redirected back to the Integration page without syncing.

Validate the Menu
- After selecting a store, the Validating Menu process will begin. This should take approximately 5 minutes.

You do not need to take any action during this stage unless a Menu Blocked error occurs.
If you encounter these errors, contact our application support team for assistance.

Common menu validation errors include:
- Deal selection is empty.
- Deal selection has the same order value.
- The condiments group is empty.
- The menu category is empty.
- Trading hours are null.
- 'Request Onboarding' in Client Admin not initiated.
Finalise the Integration
- Once the Deliverit team has resolved any menu validation issues, return to the Studio Integration page.
- Click the Update Menu button to retry the menu validation.

Confirm Successful Integration
- Upon successful integration, you will see an Integration Successful prompt.
- Click Back to Integration to return to the Integration page.
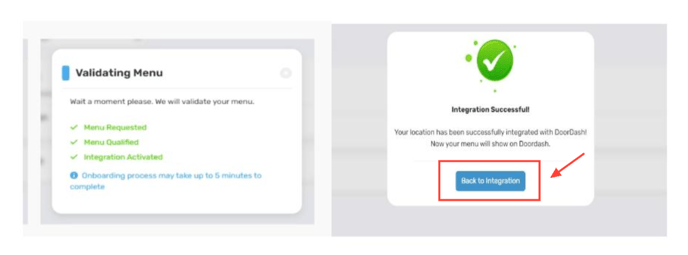
- The DoorDash Integration should now show as Connected.

By following these steps, you will be able to complete the DoorDash Marketplace self-onboarding using Deliverit Studio efficiently. If you require further assistance, please contact our application support team.