Differentiating Between Comments vs. Comments (Non-Print) in DPOS
✅ Log in to DPOS using staff credentials
✅ Go to the Orders tab
✅ Add items to the customer’s order
✅ Use the Comments field for notes that should print on the docket
– Example: “Call customer when driver arrives.”
✅ Use the Comments (Non-Print) field for internal notes only
– Example: “Customer disputed last order.”
✅ Save the order when finished.
Follow these steps to learn the intended functions.
Log in to DPOS
Use your staff credentials to sign into the DPOS terminal.

Go to the Orders Tab
Click the Orders tab to begin a new customer order or edit an existing one.

Choose a transaction type:
- Delivery
- Pickup
- Shop

Using the Comments Field
In the Comments section, enter any notes that should be printed on the order docket and seen by the kitchen or delivery drivers.
- Example: “Call customer when driver arrives.”
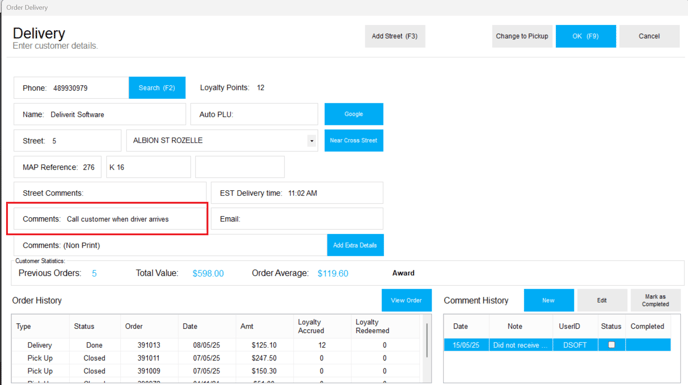
Note: This note will be printed on the docket and alert the team to special instructions.
Using the Comments (Non-Print) Field
In the Comments (Non-Print) section, add internal notes that are only visible to store staff and will not print on the docket.
- Example: “Customer disputed last order – verify address before sending.”
This is useful for sensitive information or internal follow-ups.

Click the OK(F9) button.

Summary of the Difference:
|
Comment Type |
Visible On Docket |
Visible to Store Staff |
Usage Example |
|
Comments |
✅ Yes |
✅ Yes |
“Call on arrival” (for drivers/kitchen) |
|
Comments (Non-Print) |
❌ No |
✅ Yes |
“Issue with previous delivery” |
By following these steps, you will be able to use Comments and Comments (Non-Print) effectively in DPOS. If you require further assistance, please contact our application support team.